如何使用go 语言开发一个项目发布到Github
go (golang) 语言开发一个模块发布到Github

前期准备
IDE或编辑器选择
-
GoLand(推荐) -
VsCode -
LiteIDE - 其他
Go 语言相关基础了解
-
go语言环境安装 -
go目录结构了解 -
go基本语法了解
Github 准备
- 本地安装
git客户端,对git有一些基础了解,可以使用常用的一些命令,如:git pullgit pushgit addgit commitgit tag等 - 有一个
Github账号 - 了解
Github一些基础操作:如创建一个库、 本地拉取一个库等 - 使用公钥验证,本地电脑公钥添加到
Github,可自行搜索根据相关文章教程进行本地密钥生成及添加到Github,这里不在详细介绍
创建并发布 easy-db 项目
easy-db 项目是我本身想开发的一个项目,目标是对数据库操作进行一层封装,更简单的实现调用与结果处理,这里先实现一个 mongo 数据库的部分作为例子
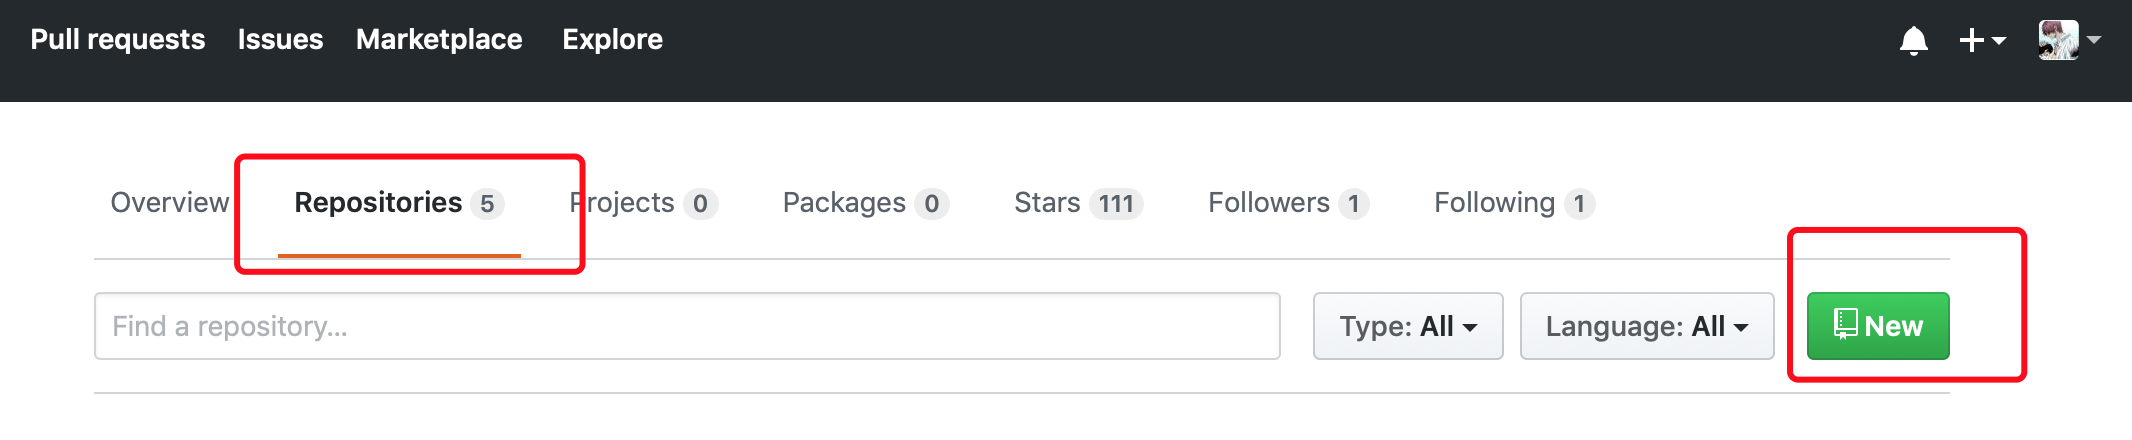
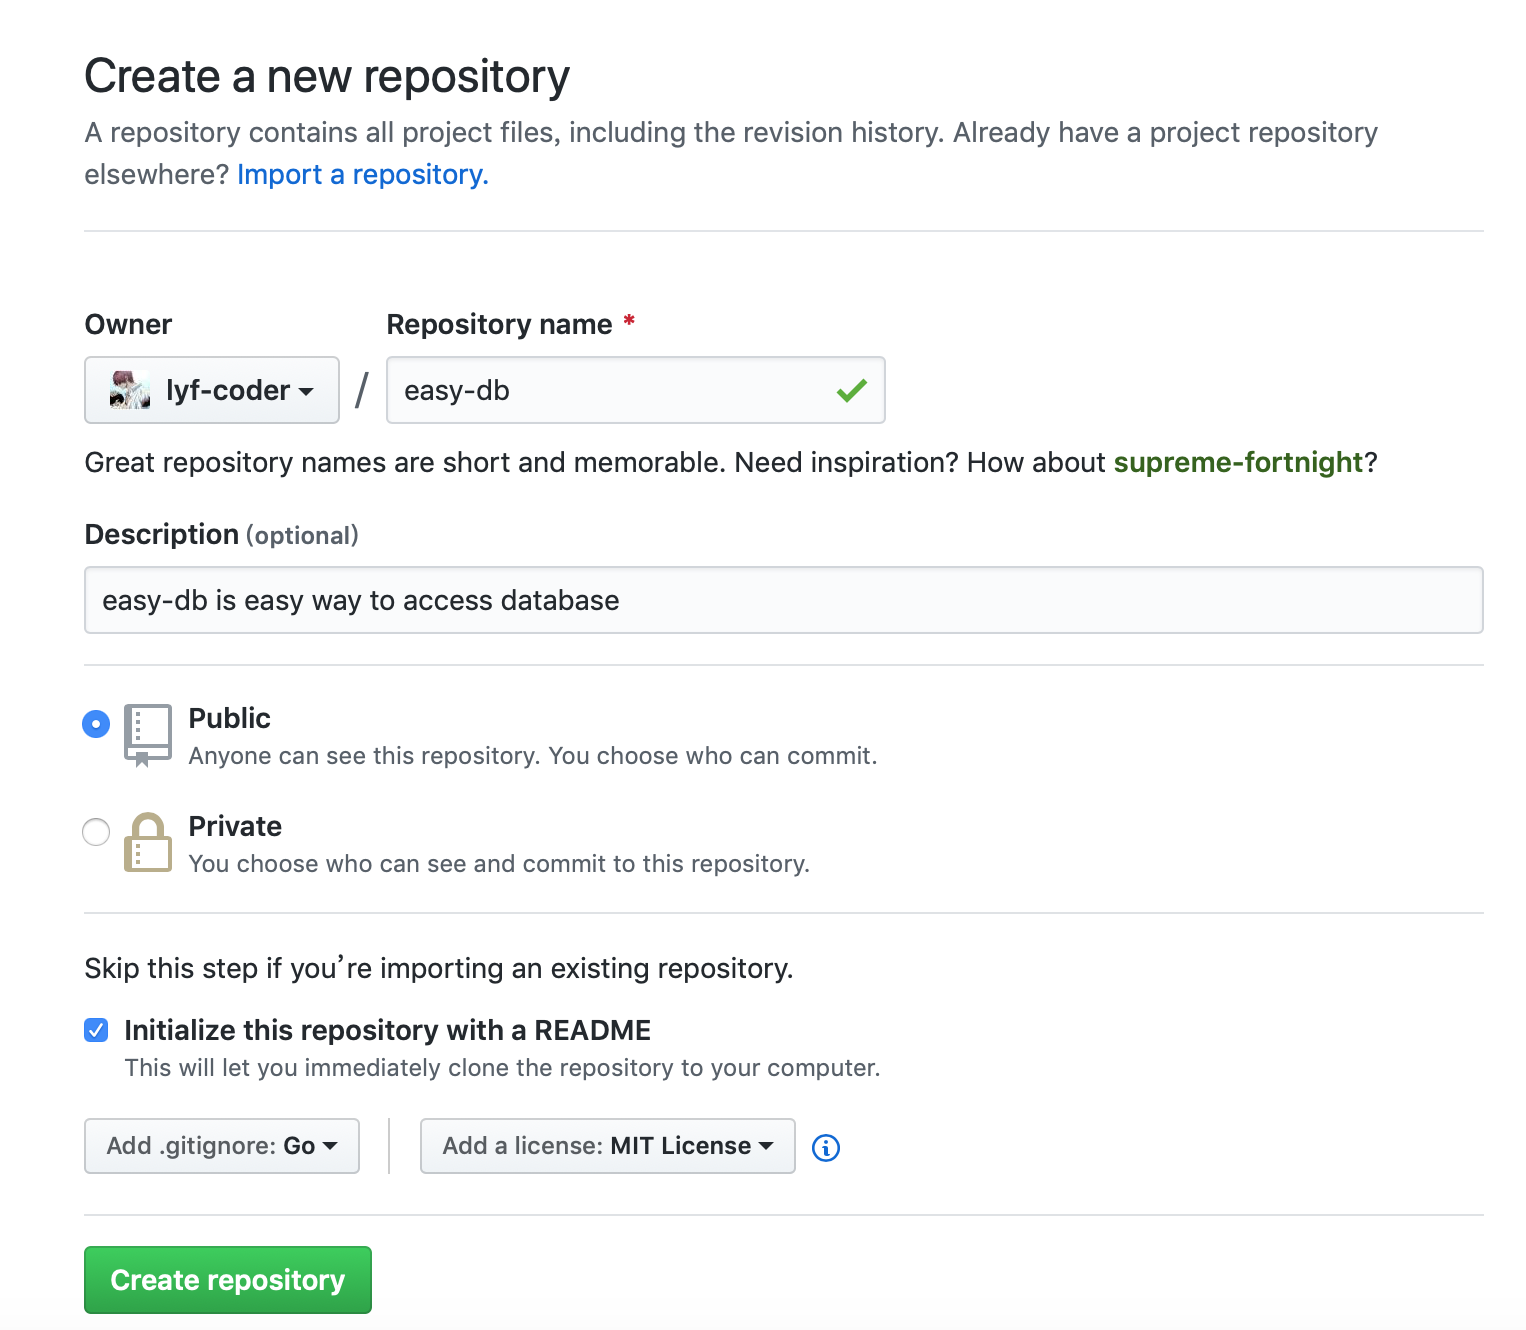
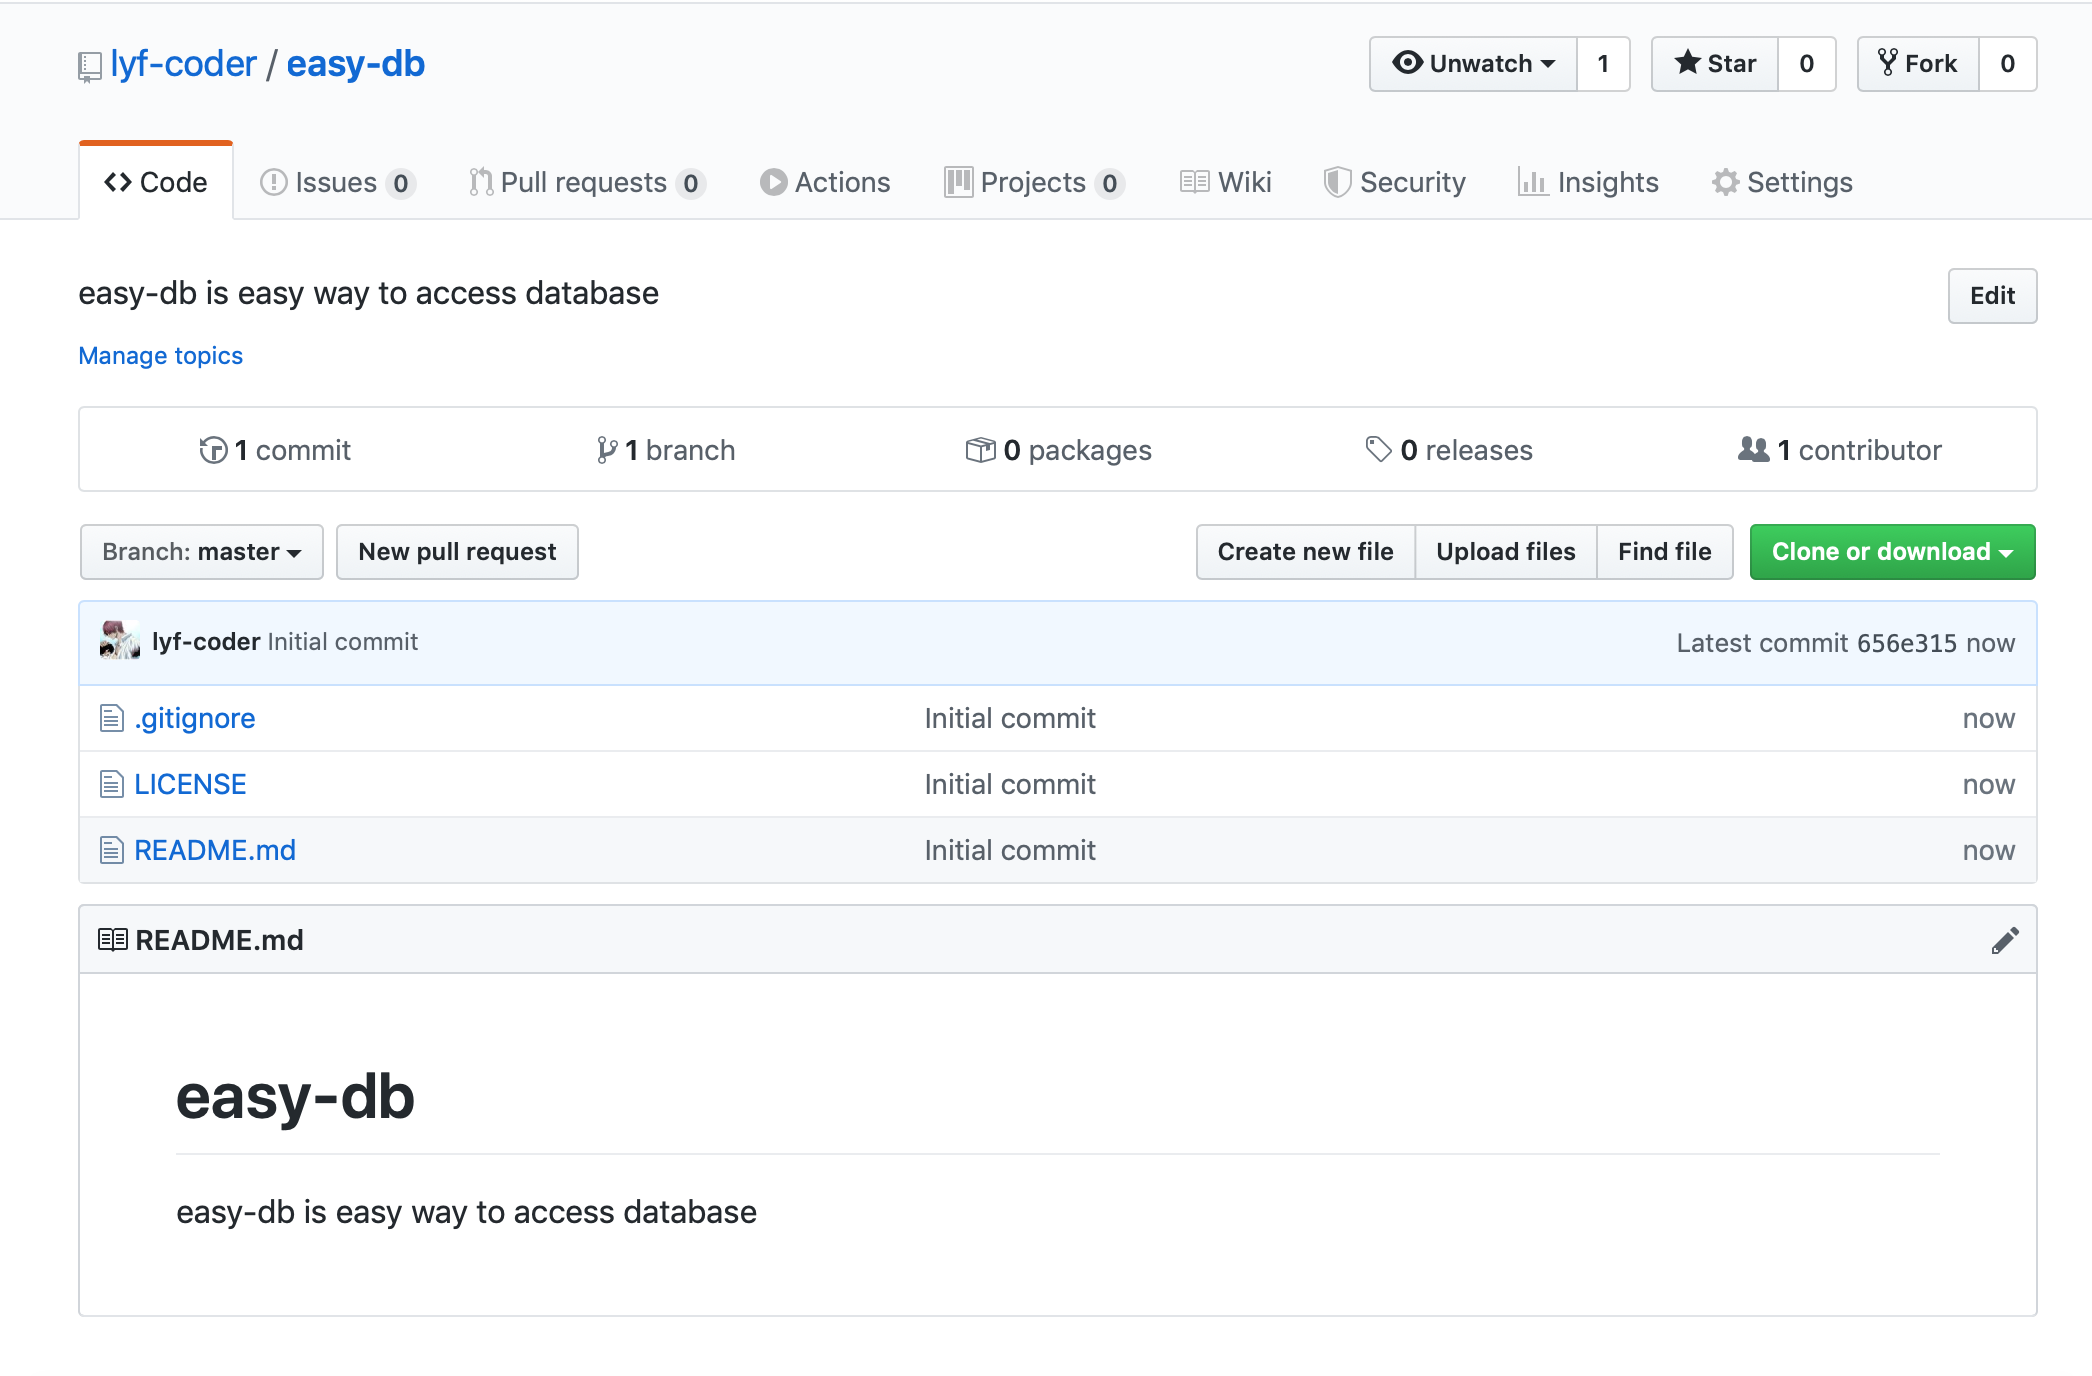
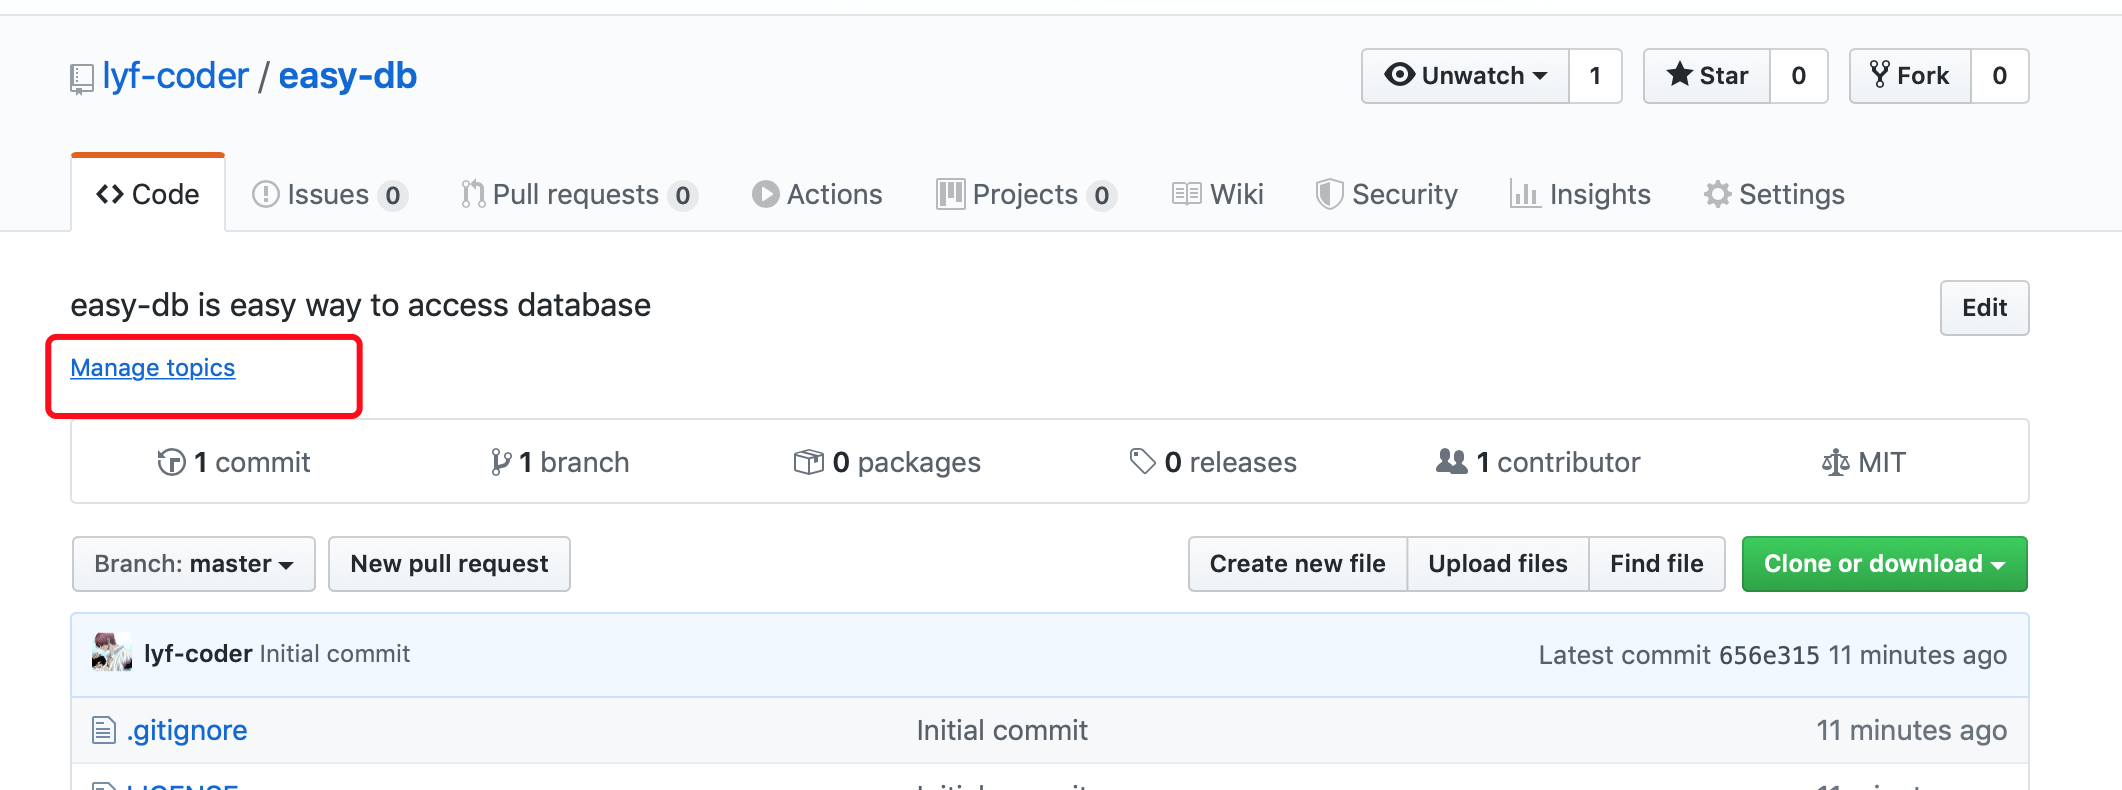
Github 上创建 easy-db 仓库
- 找到创建仓库按钮
- 创建界面
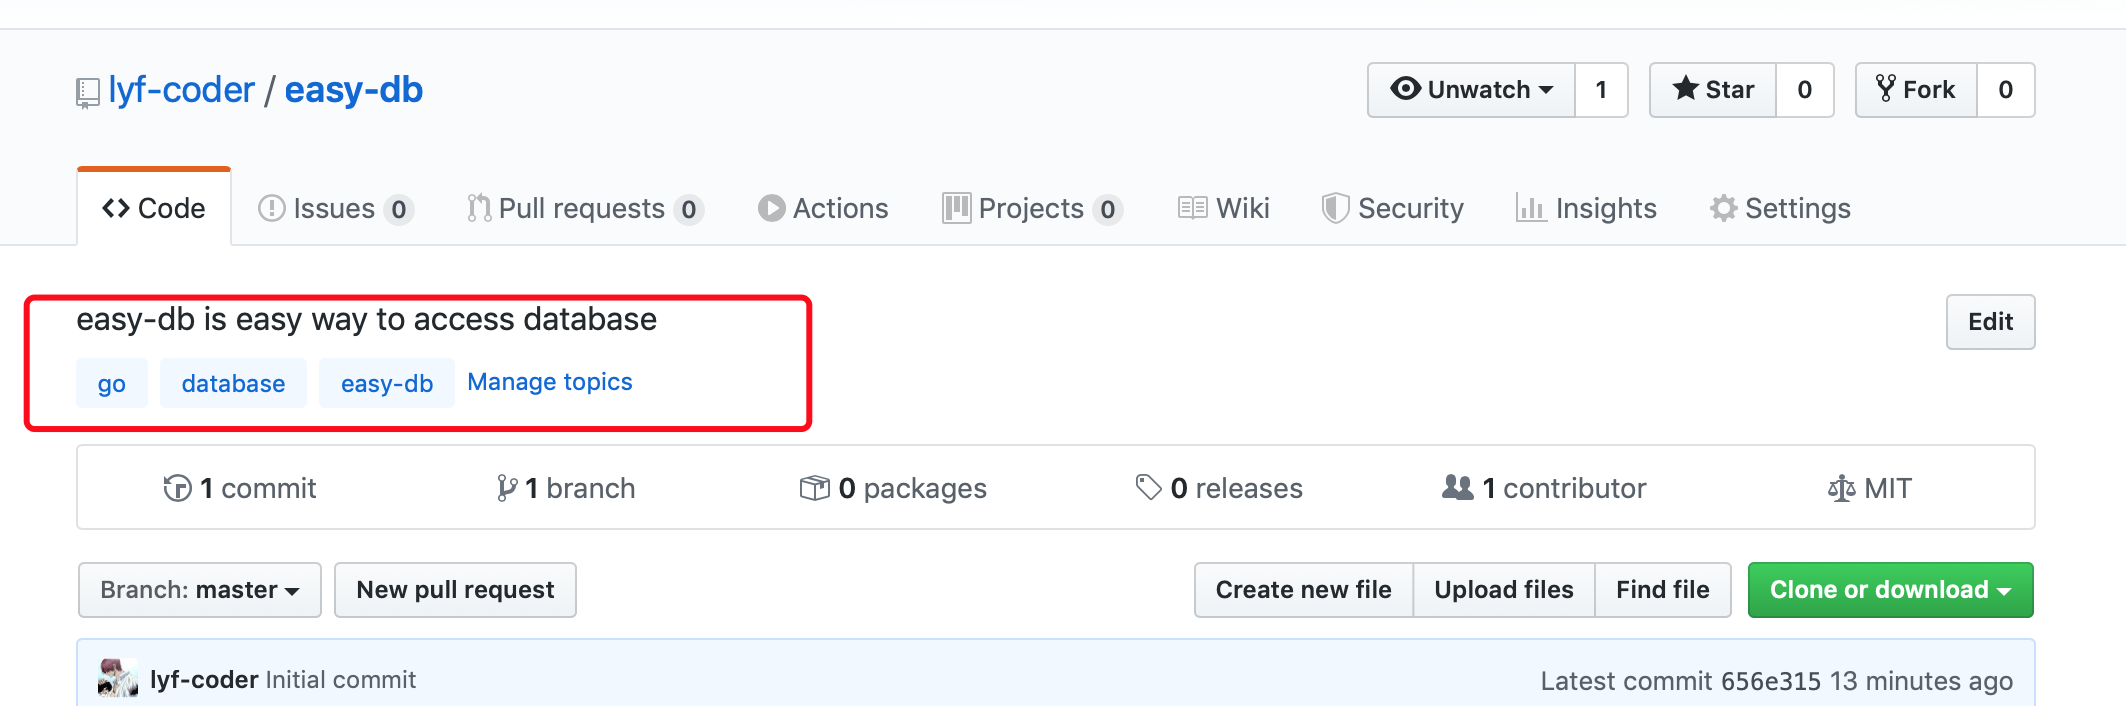
- 创建成功界面
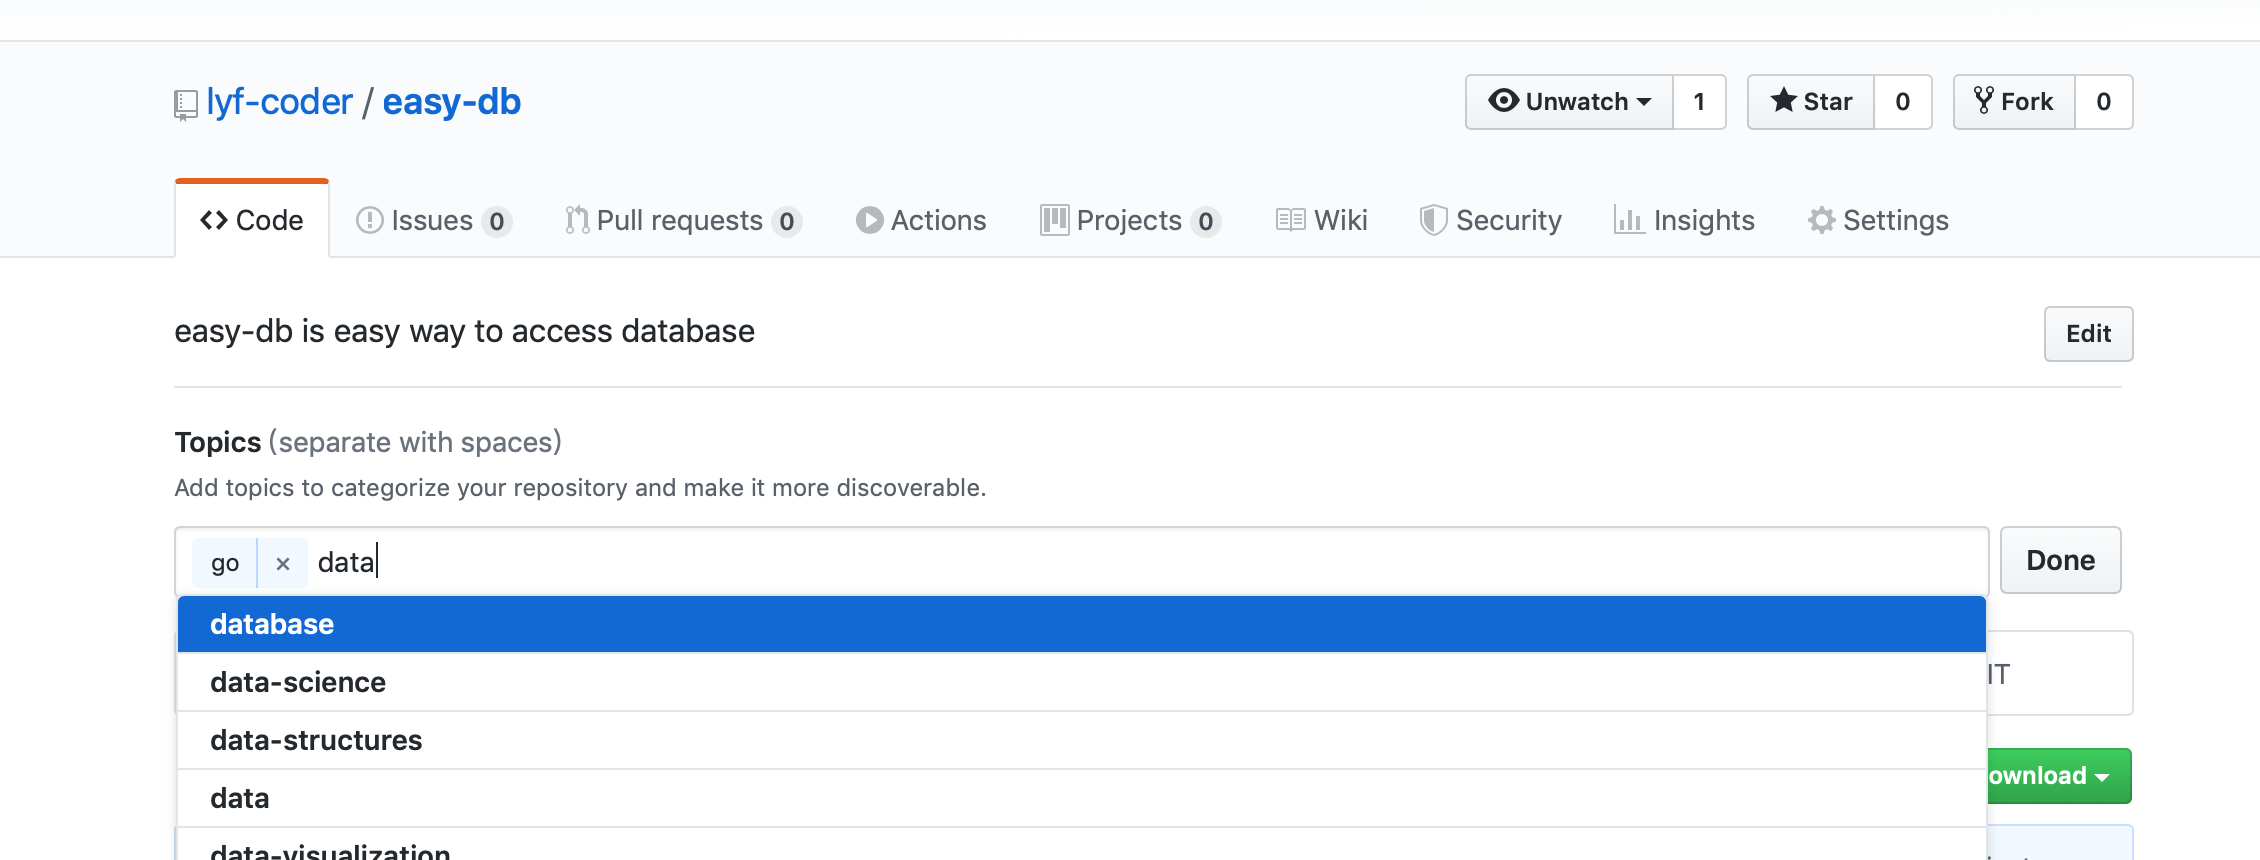
- 添加项目相关
topics用于Github上方便被检索
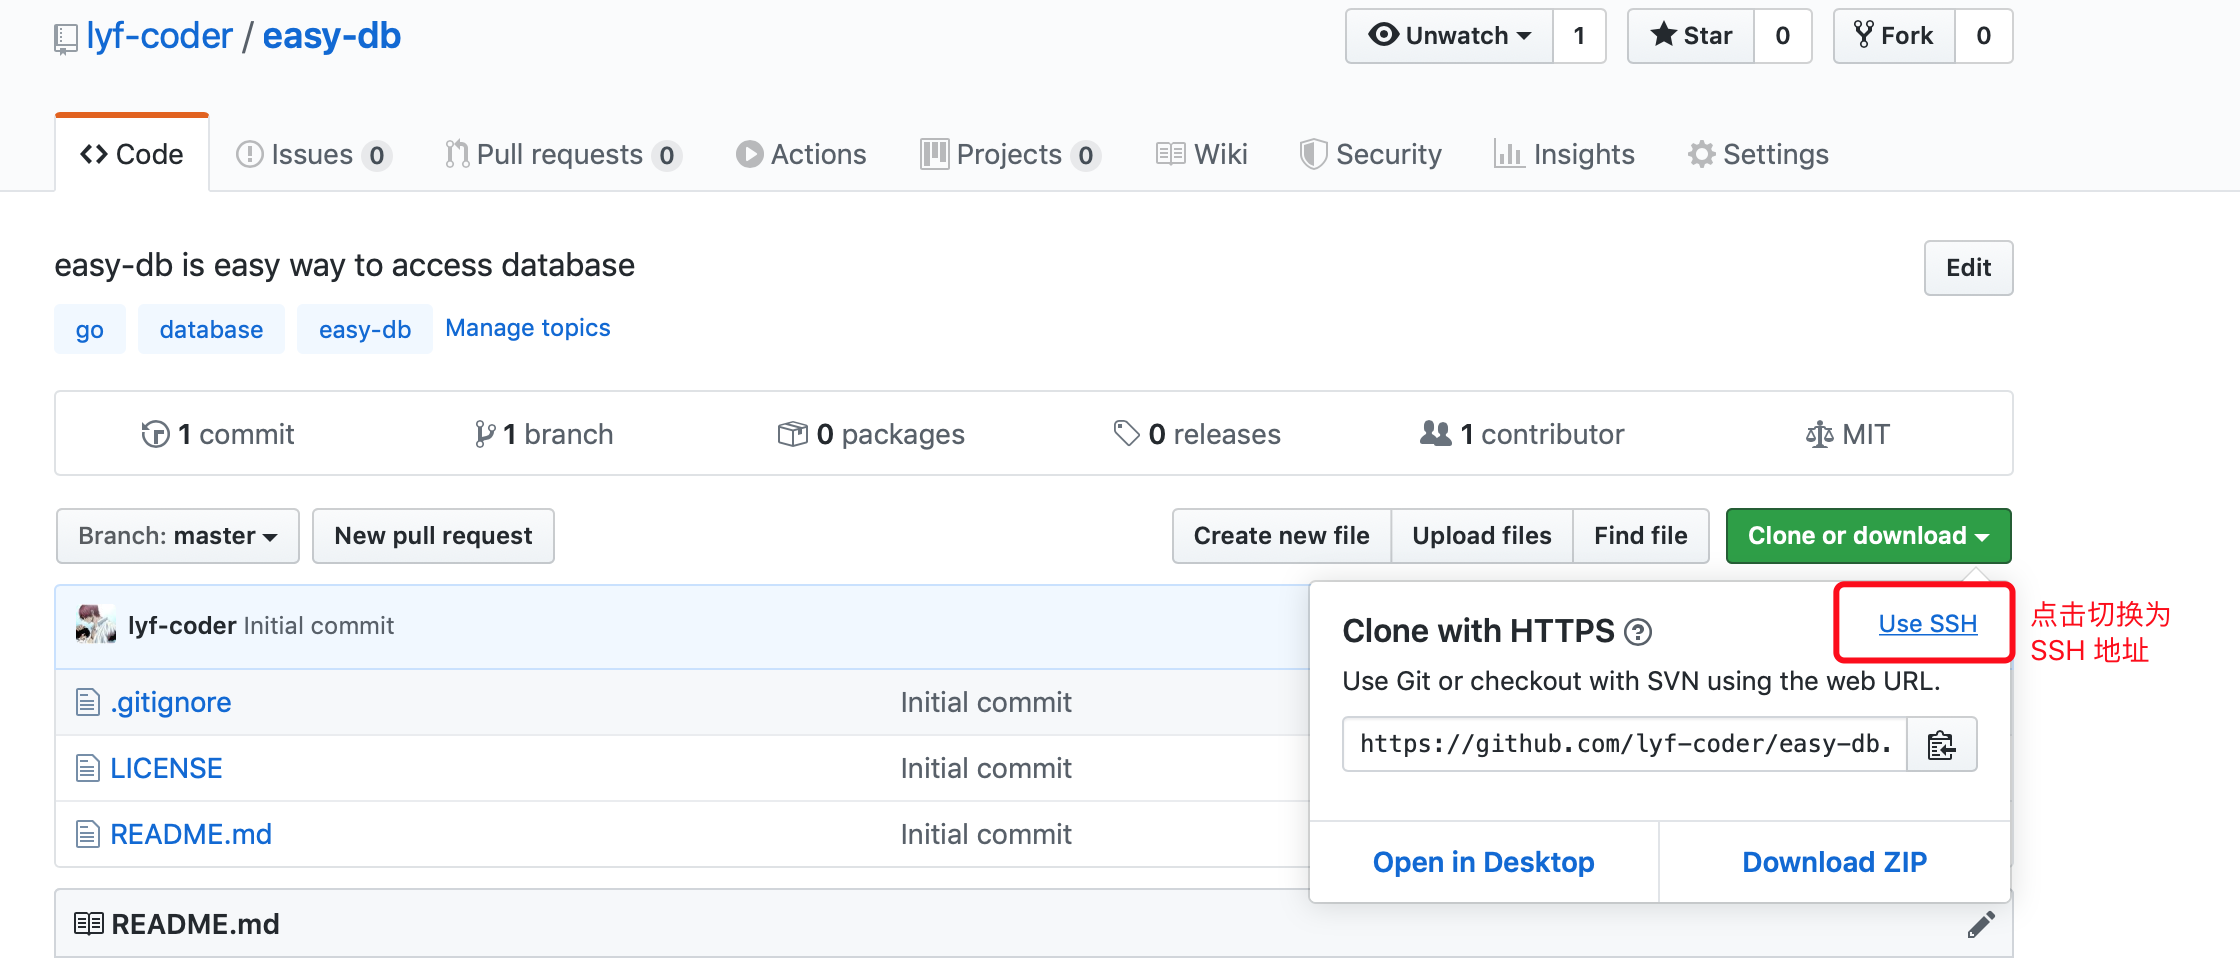
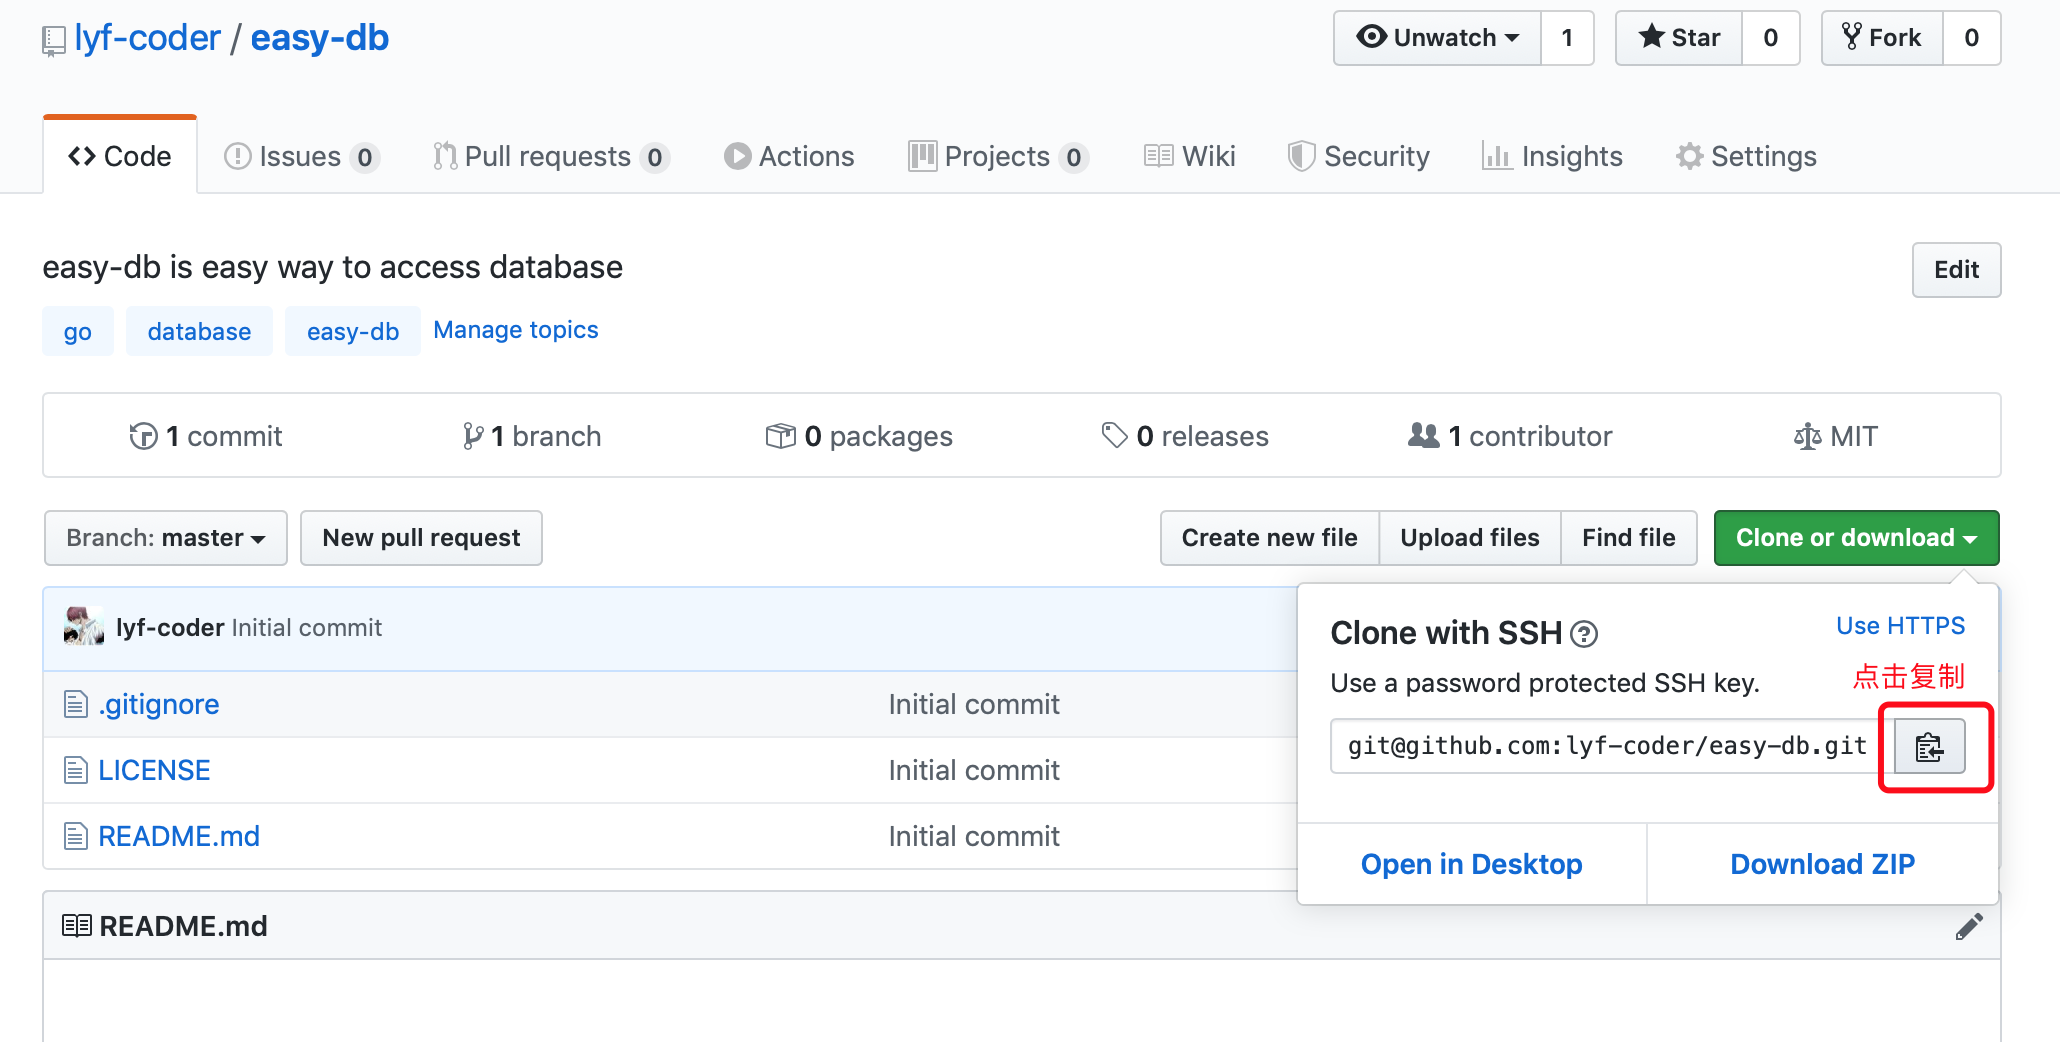
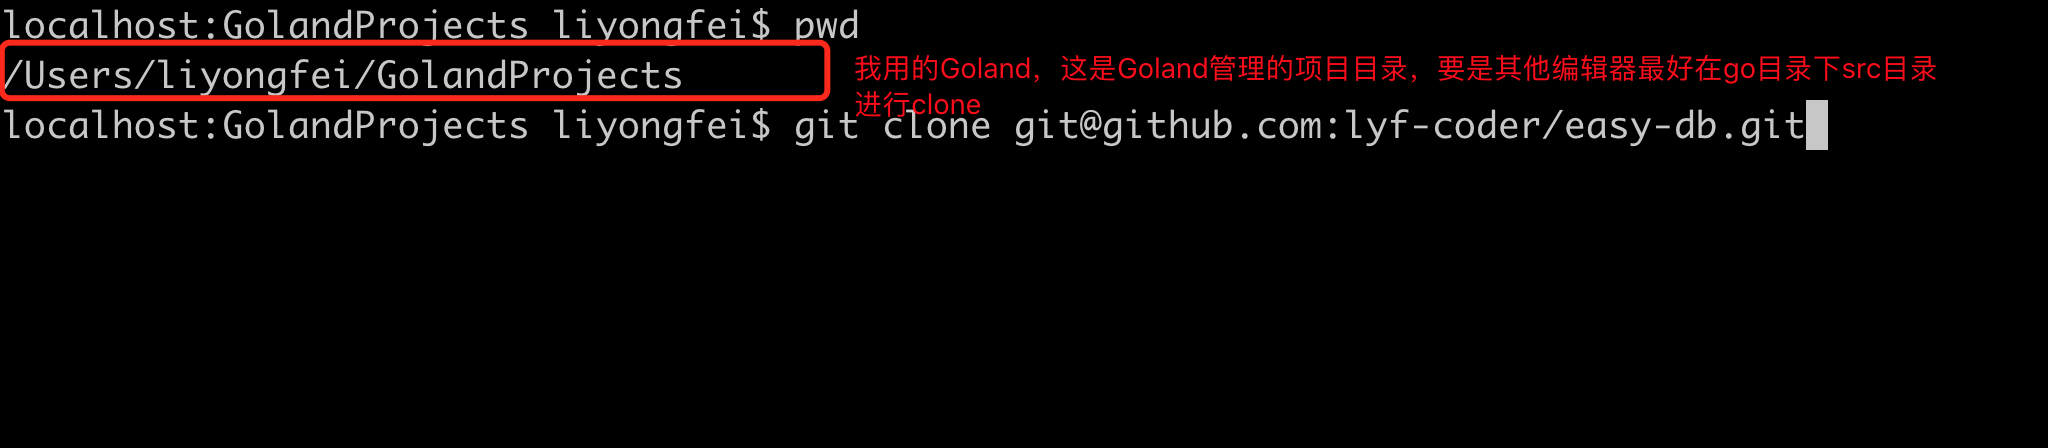
- 通过
ssh方式克隆项目到本地(前提条件:本地已经安装好git客户端,并且把本地电脑的ssh公钥添加到了Github个人账号SSH管理中)
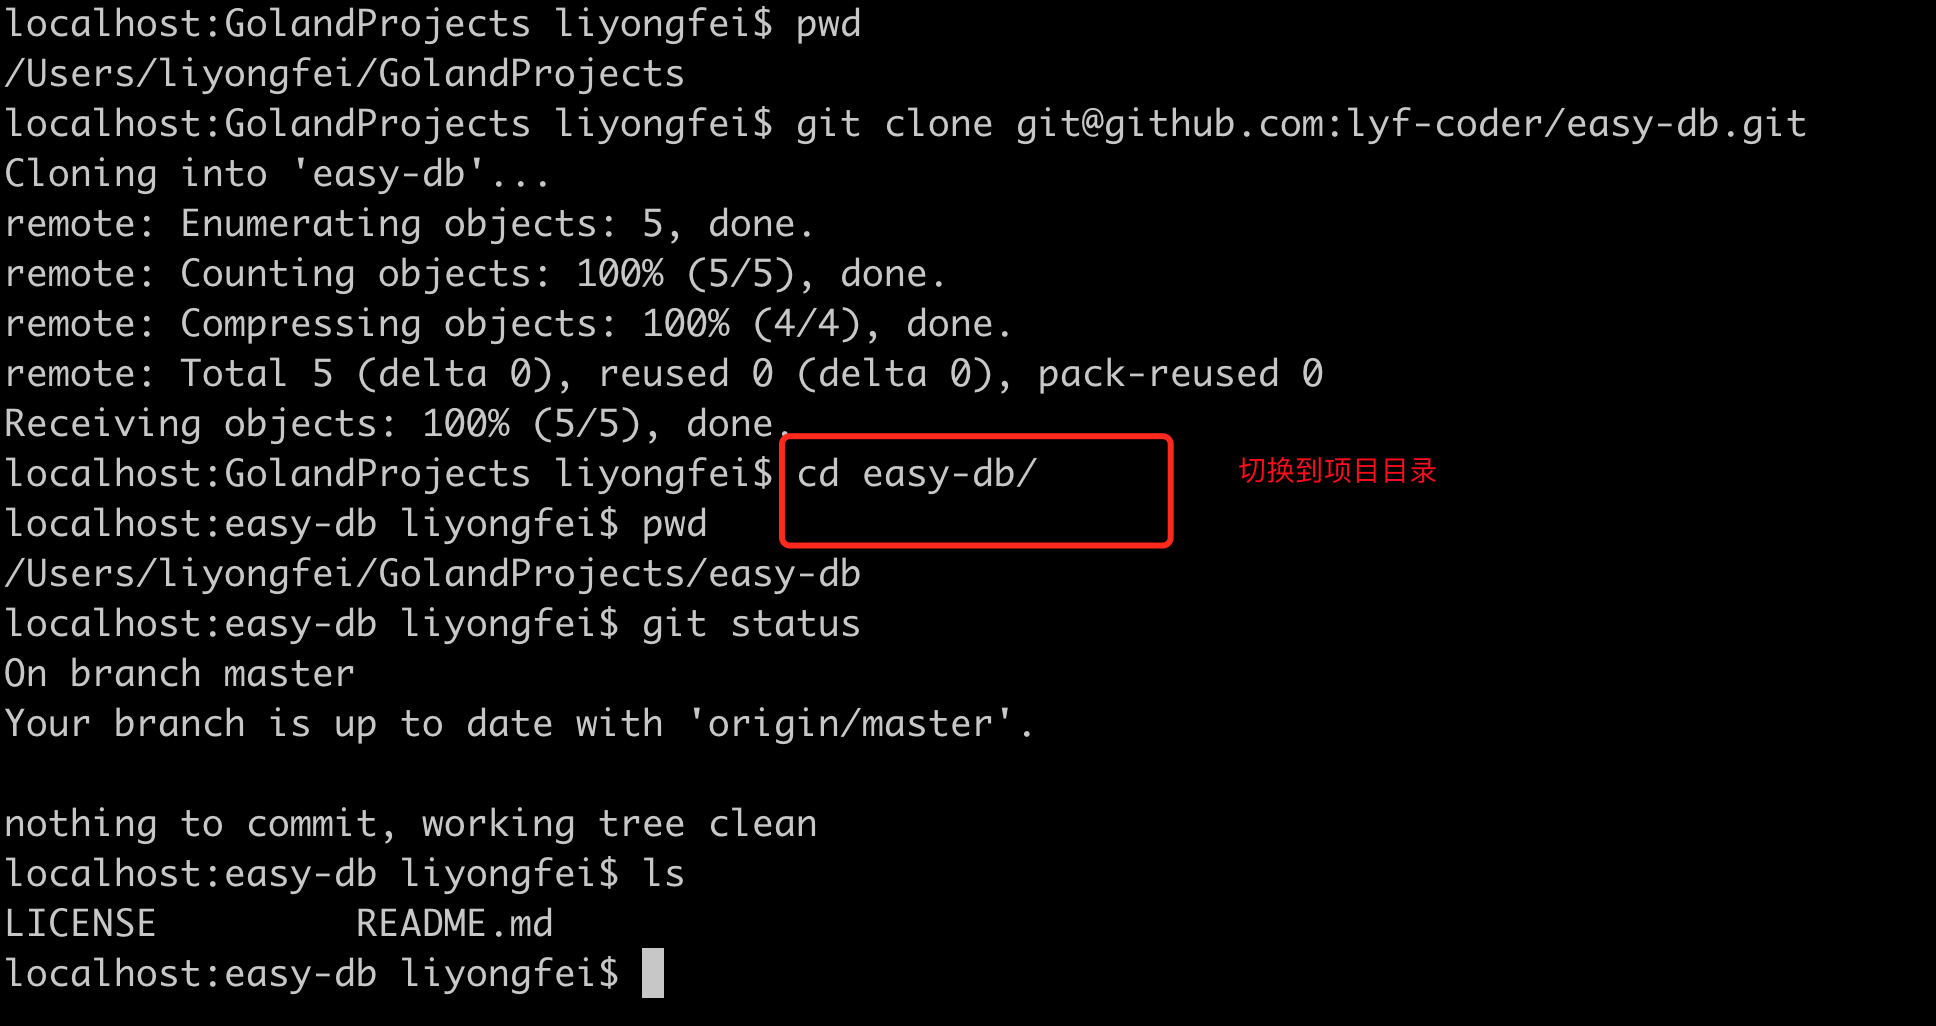
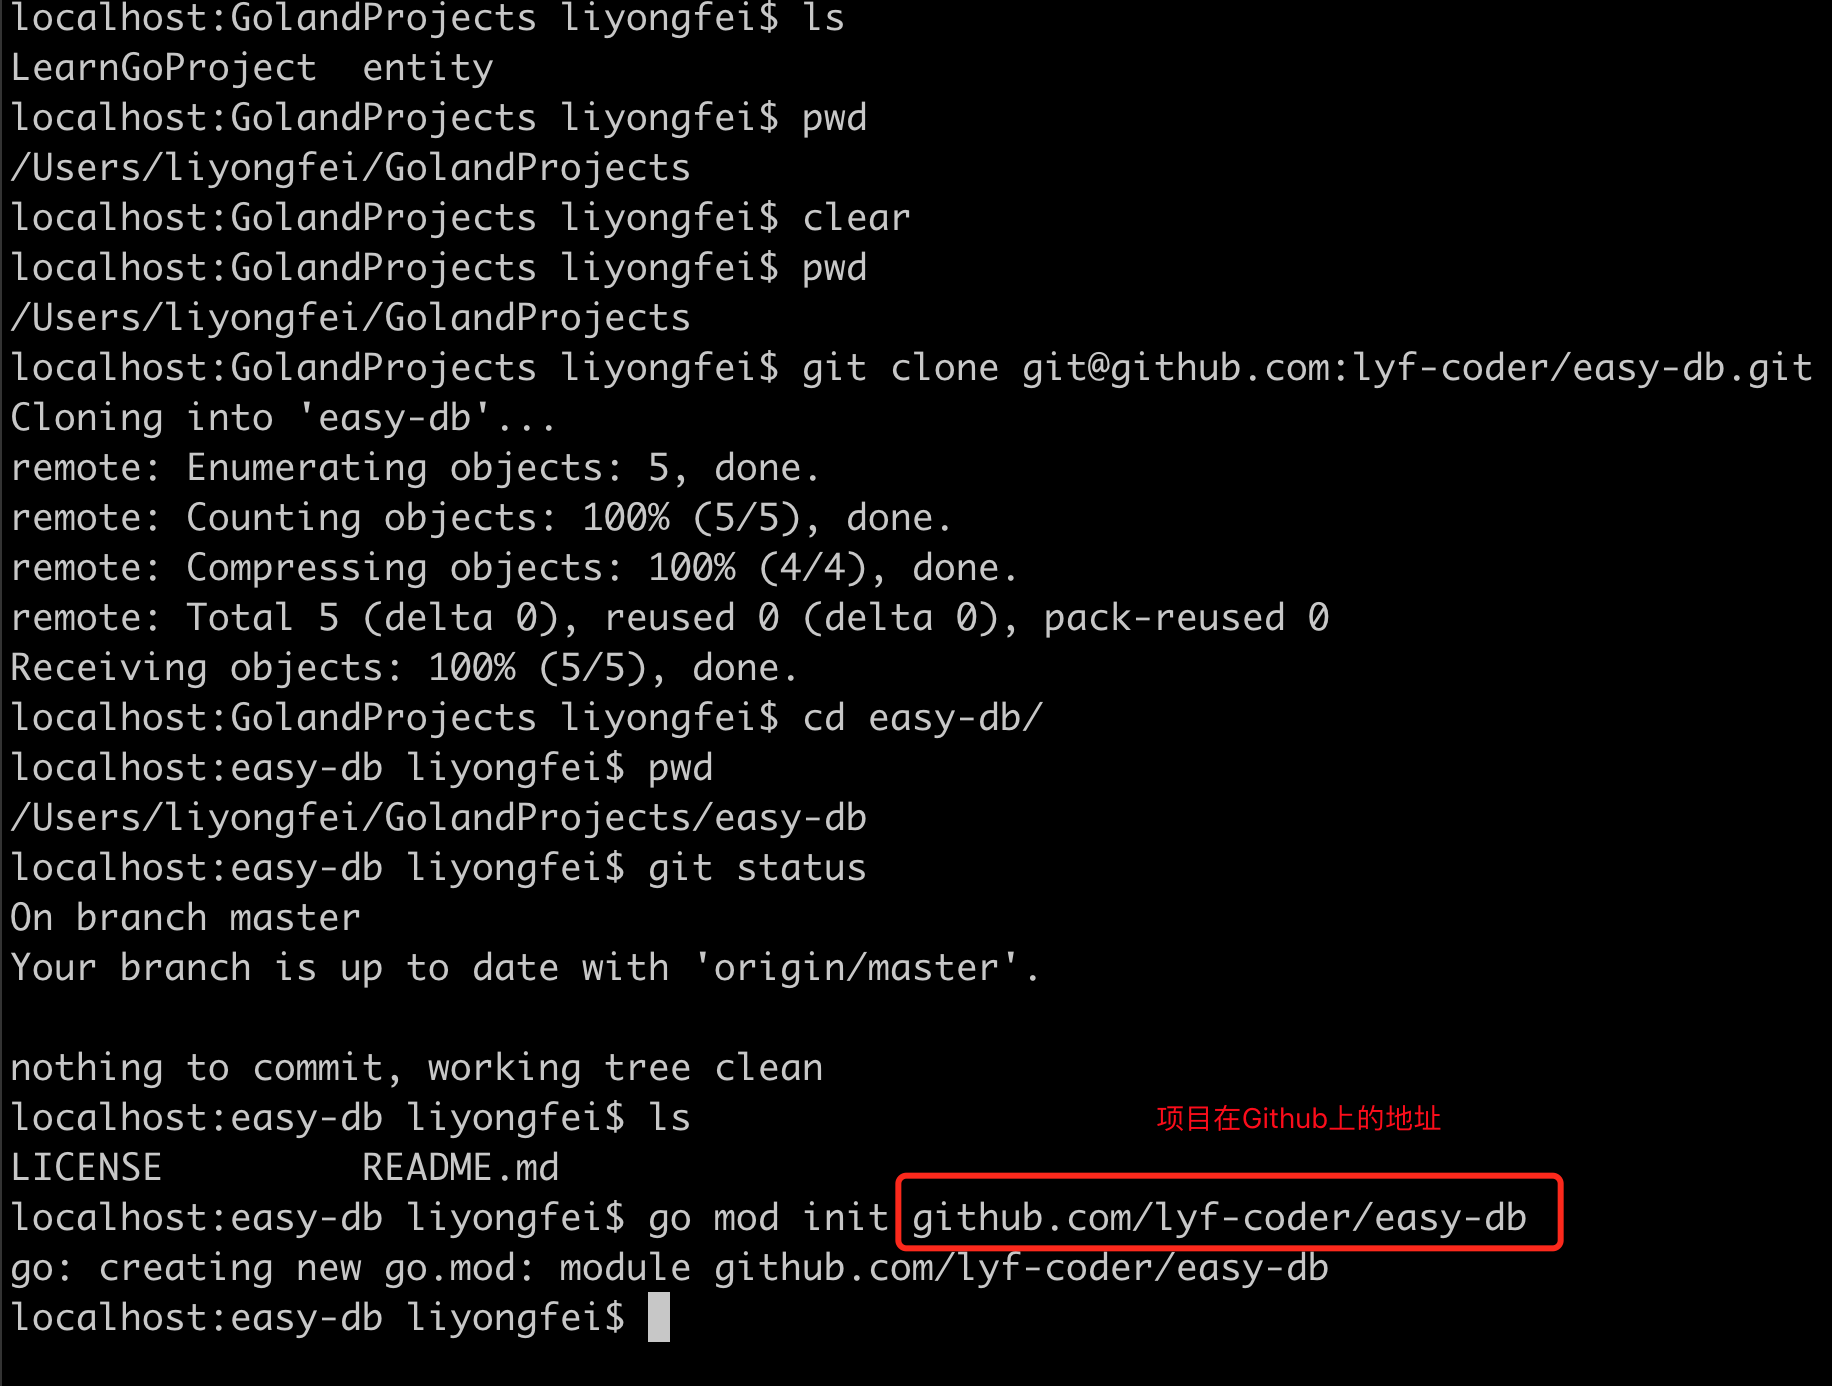
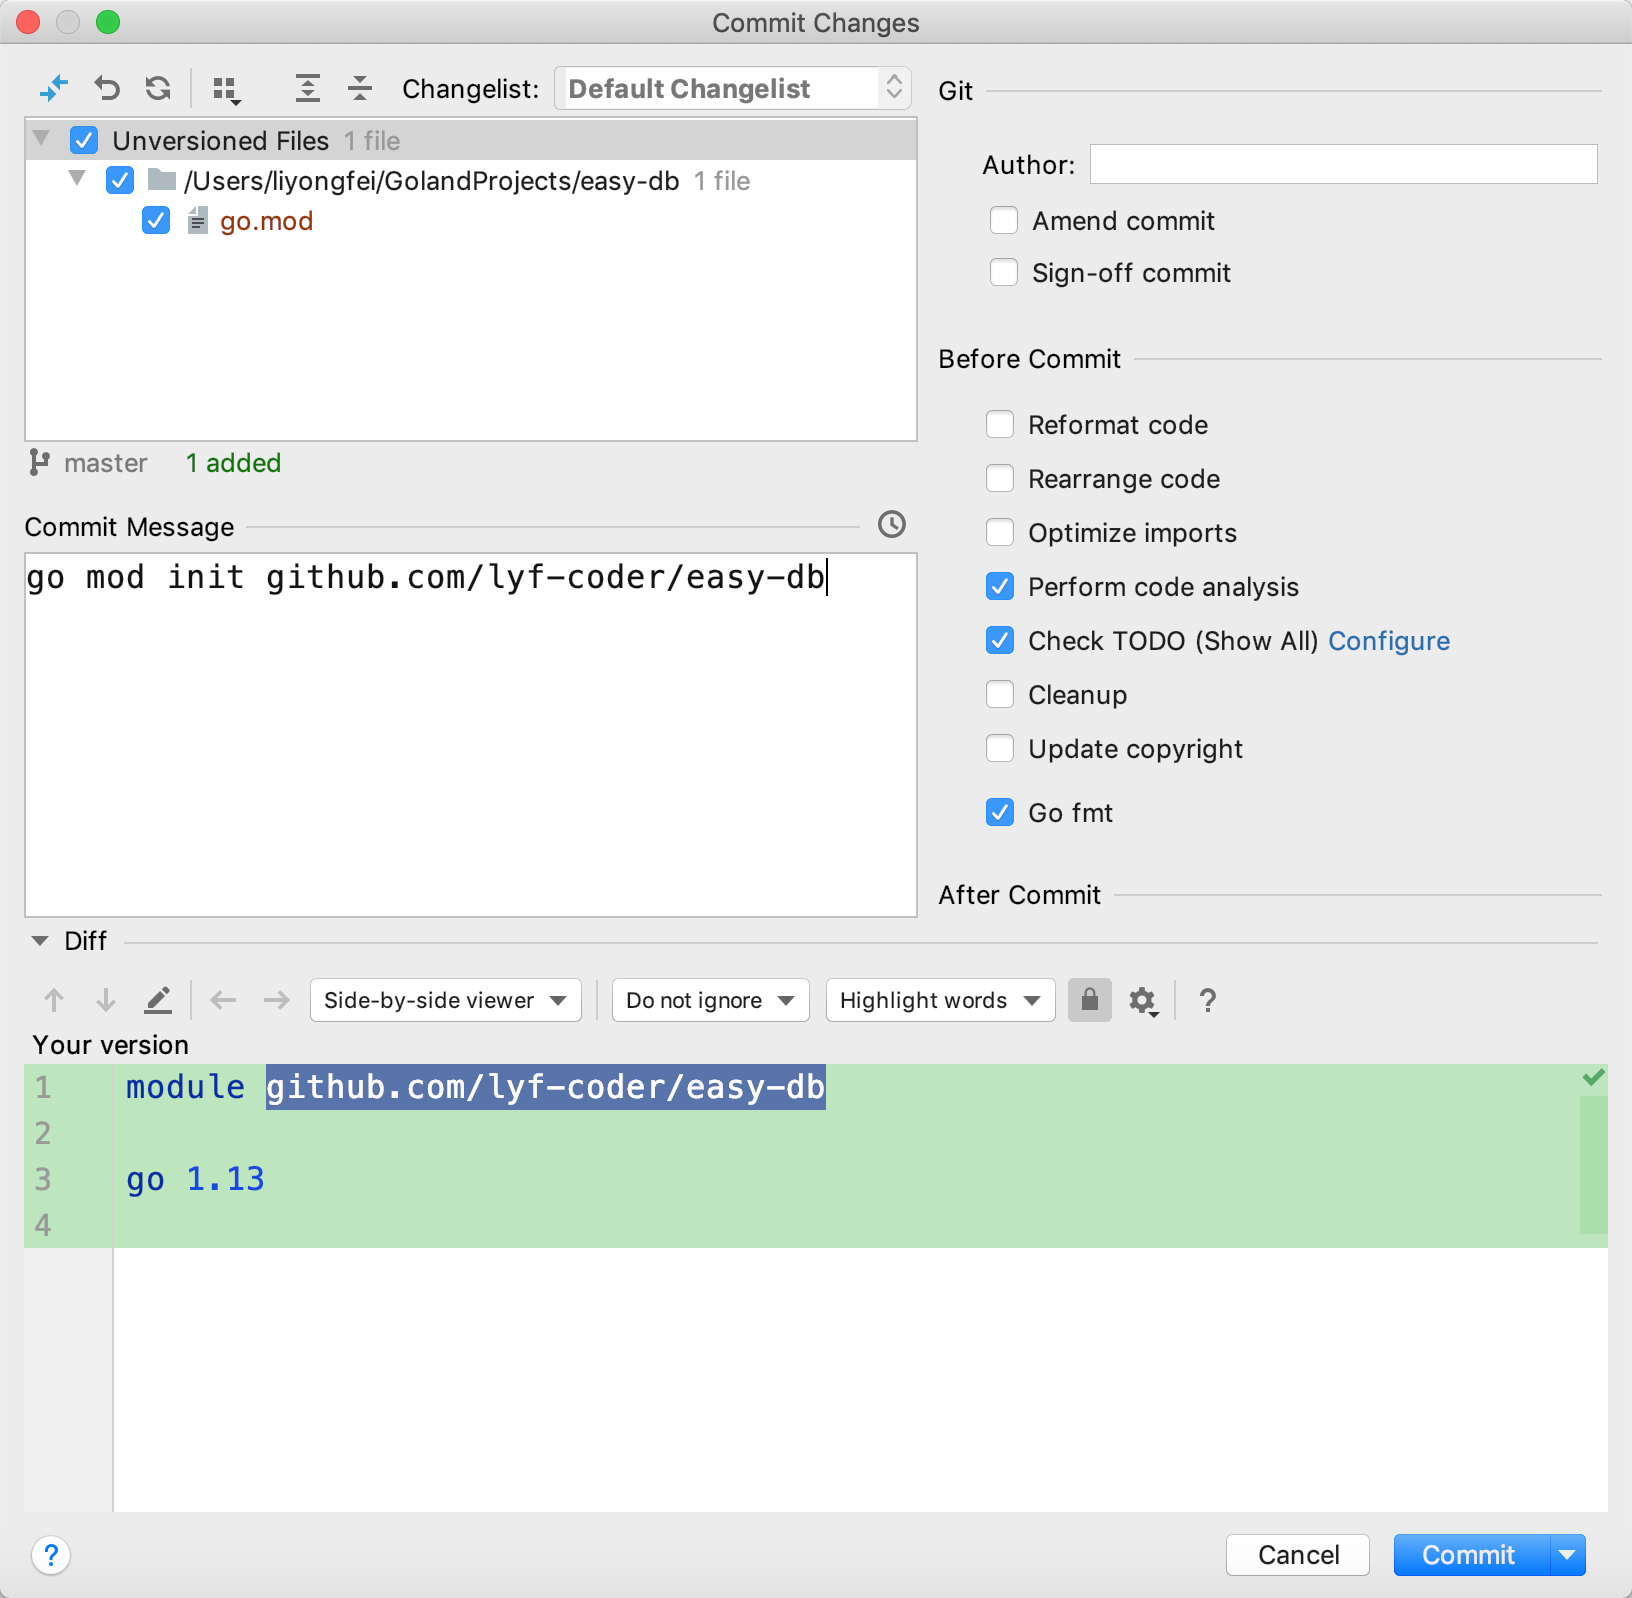
- 在项目目录下初始化
go模块 -go mod init github.com/lyf-coder/easy-db
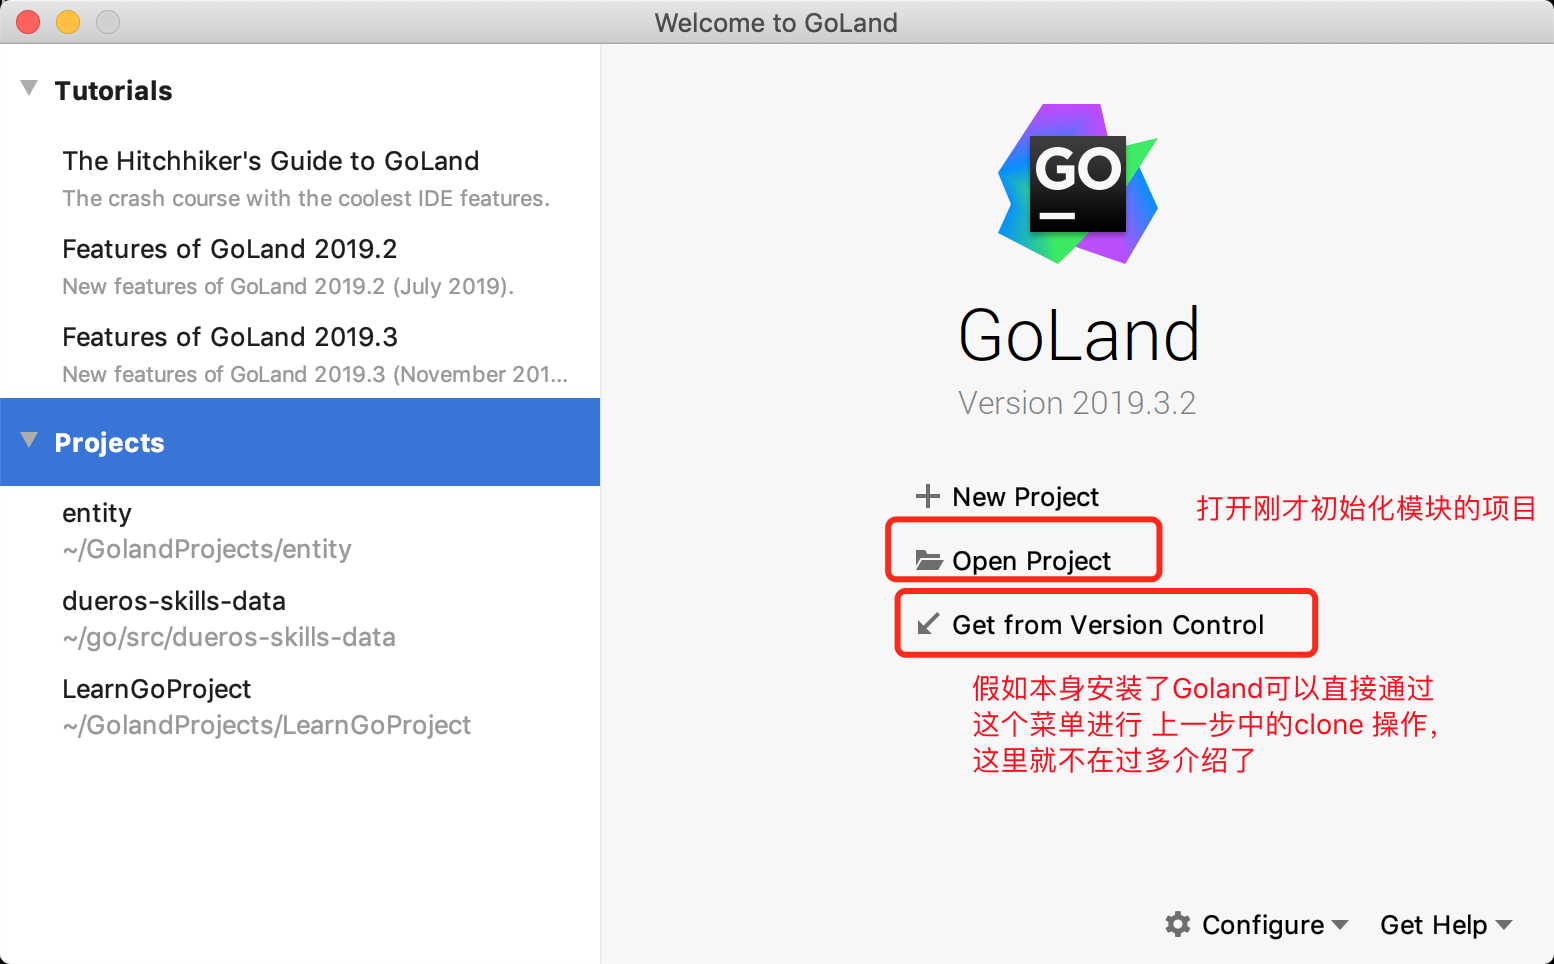
- 在
Goland中打开项目
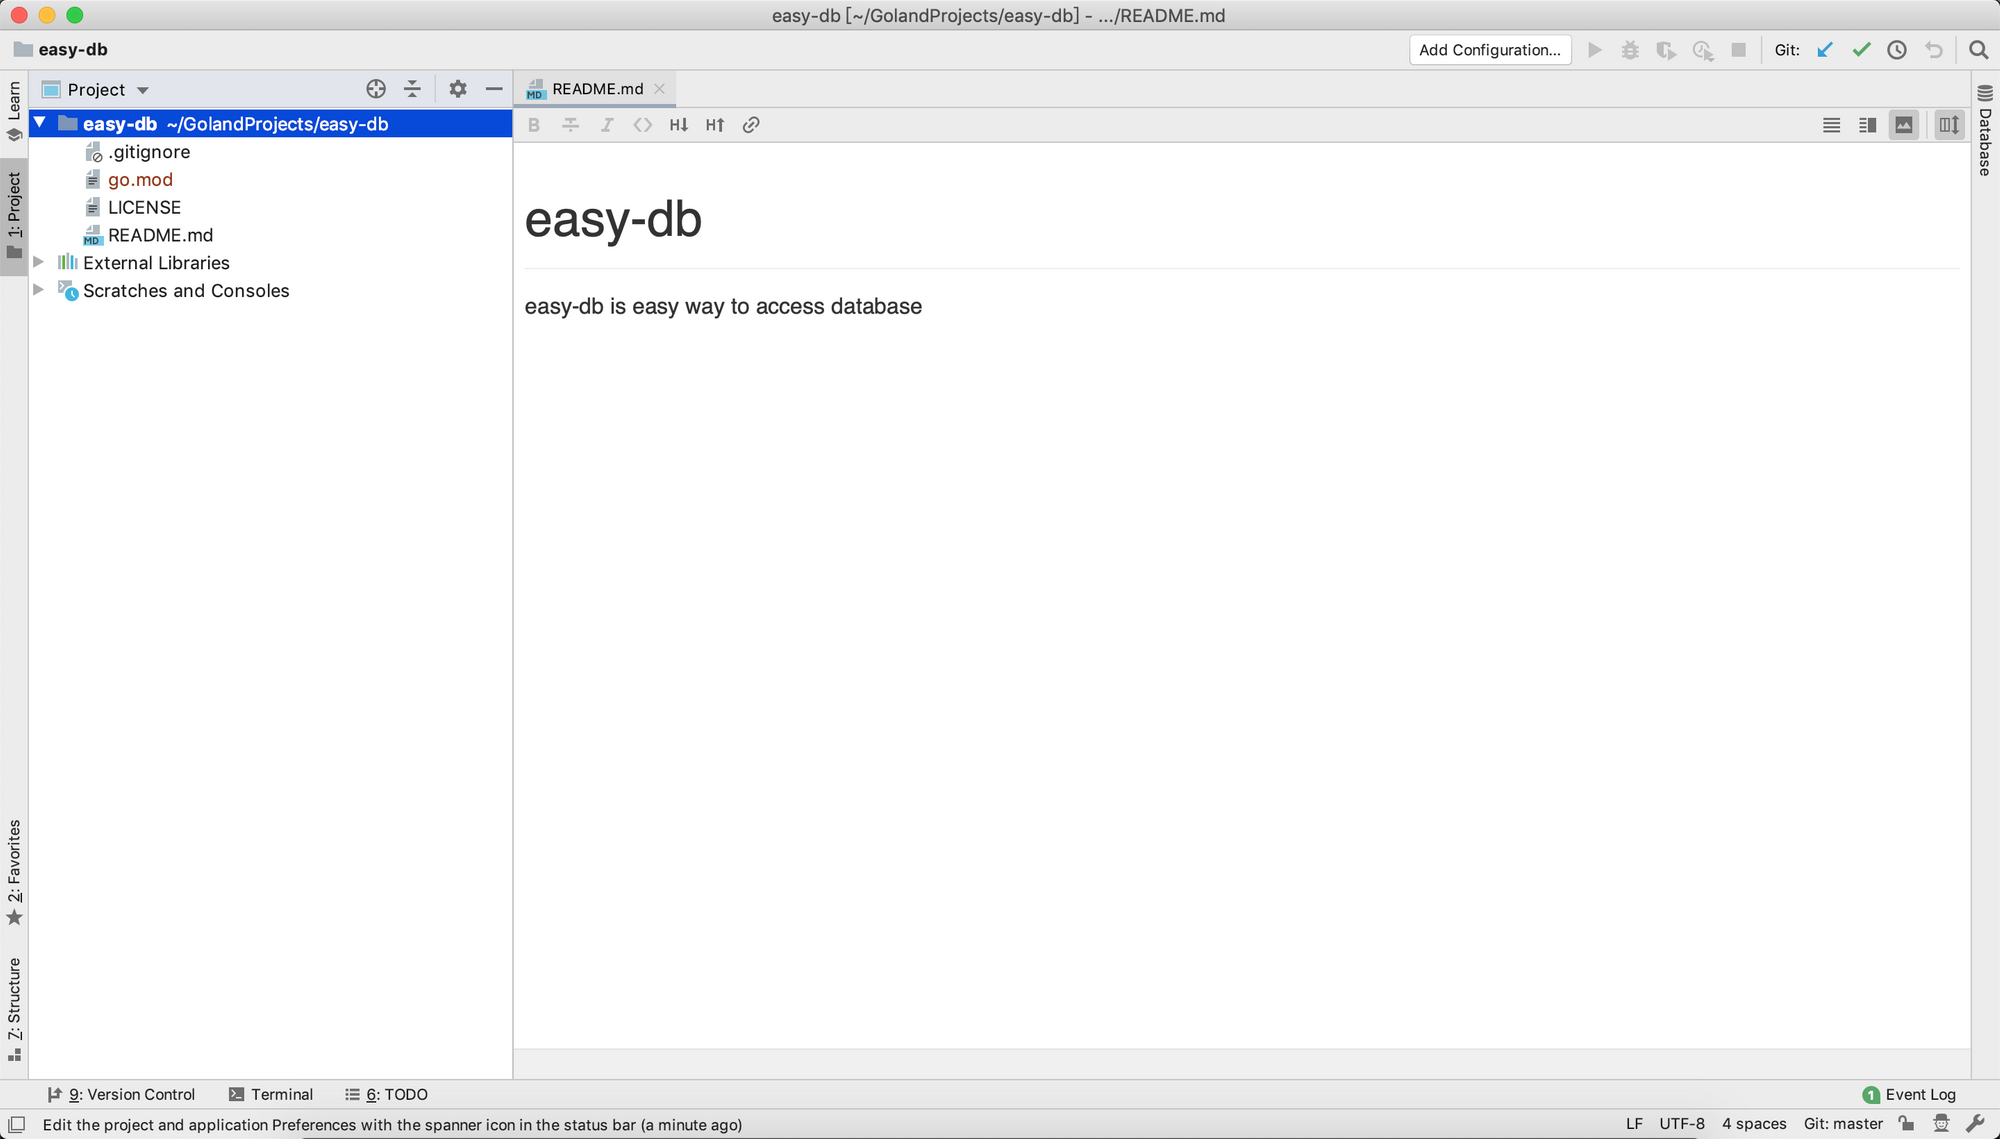
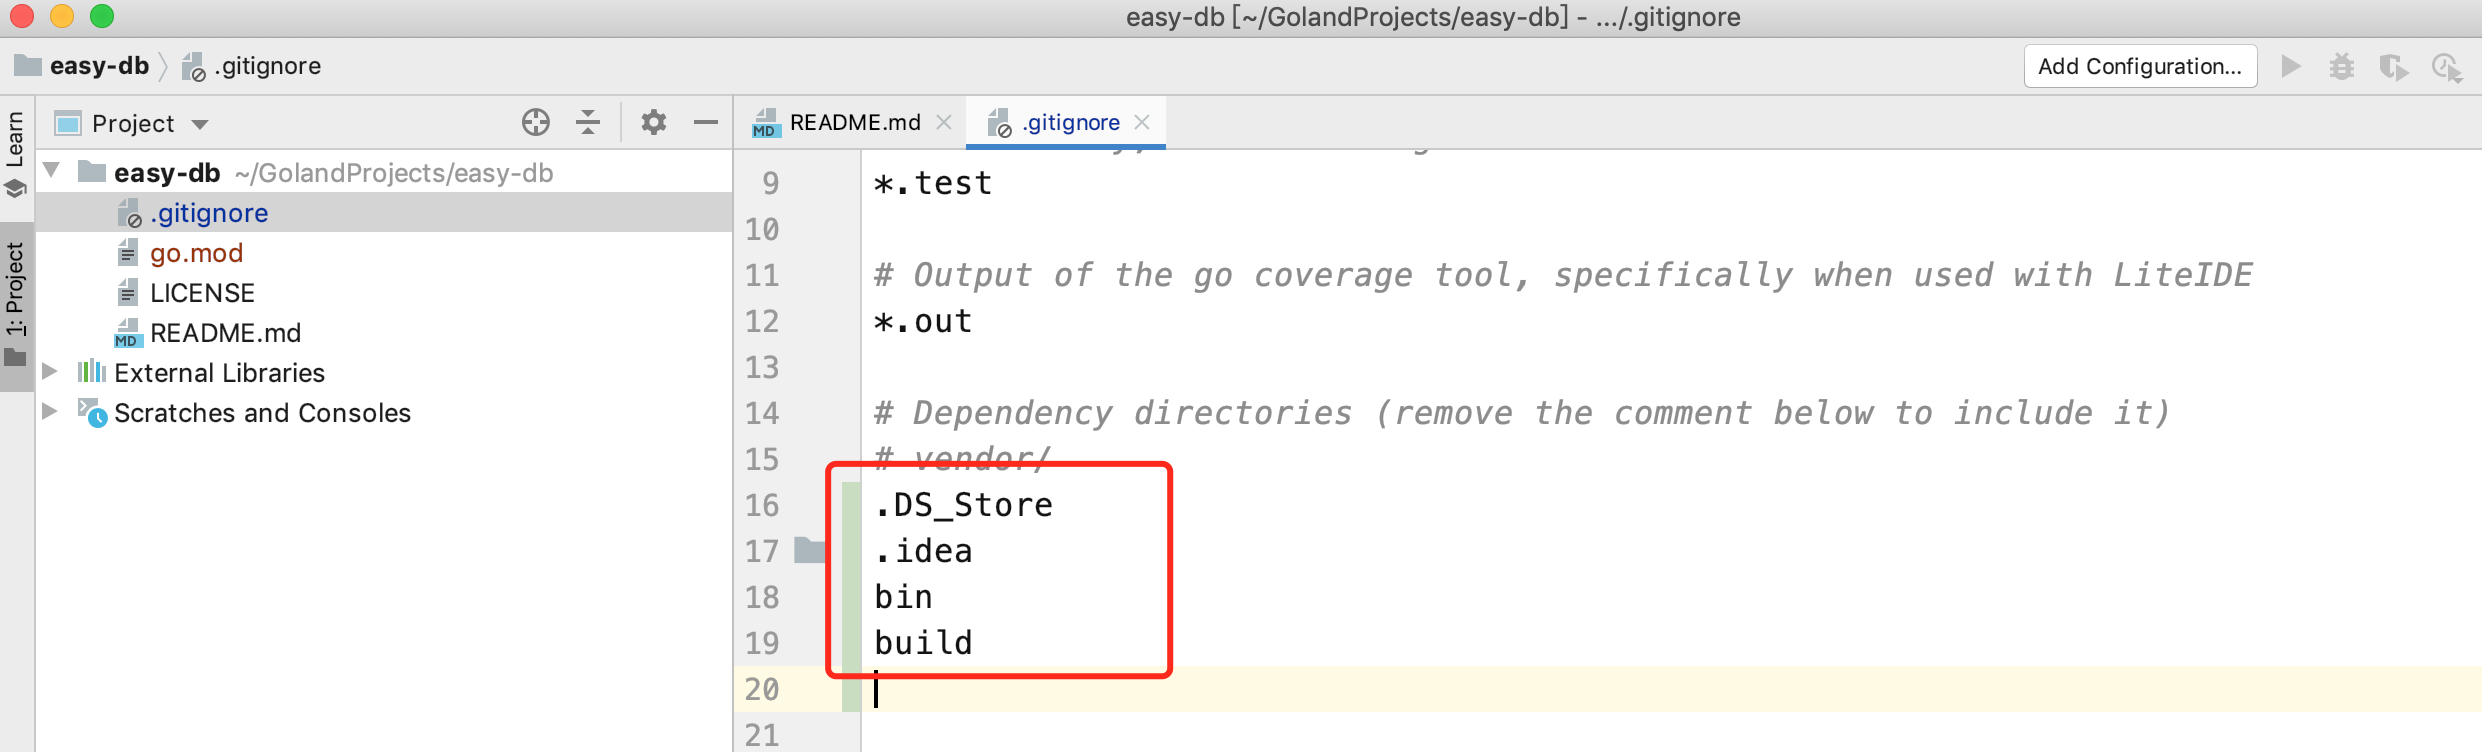
- 对
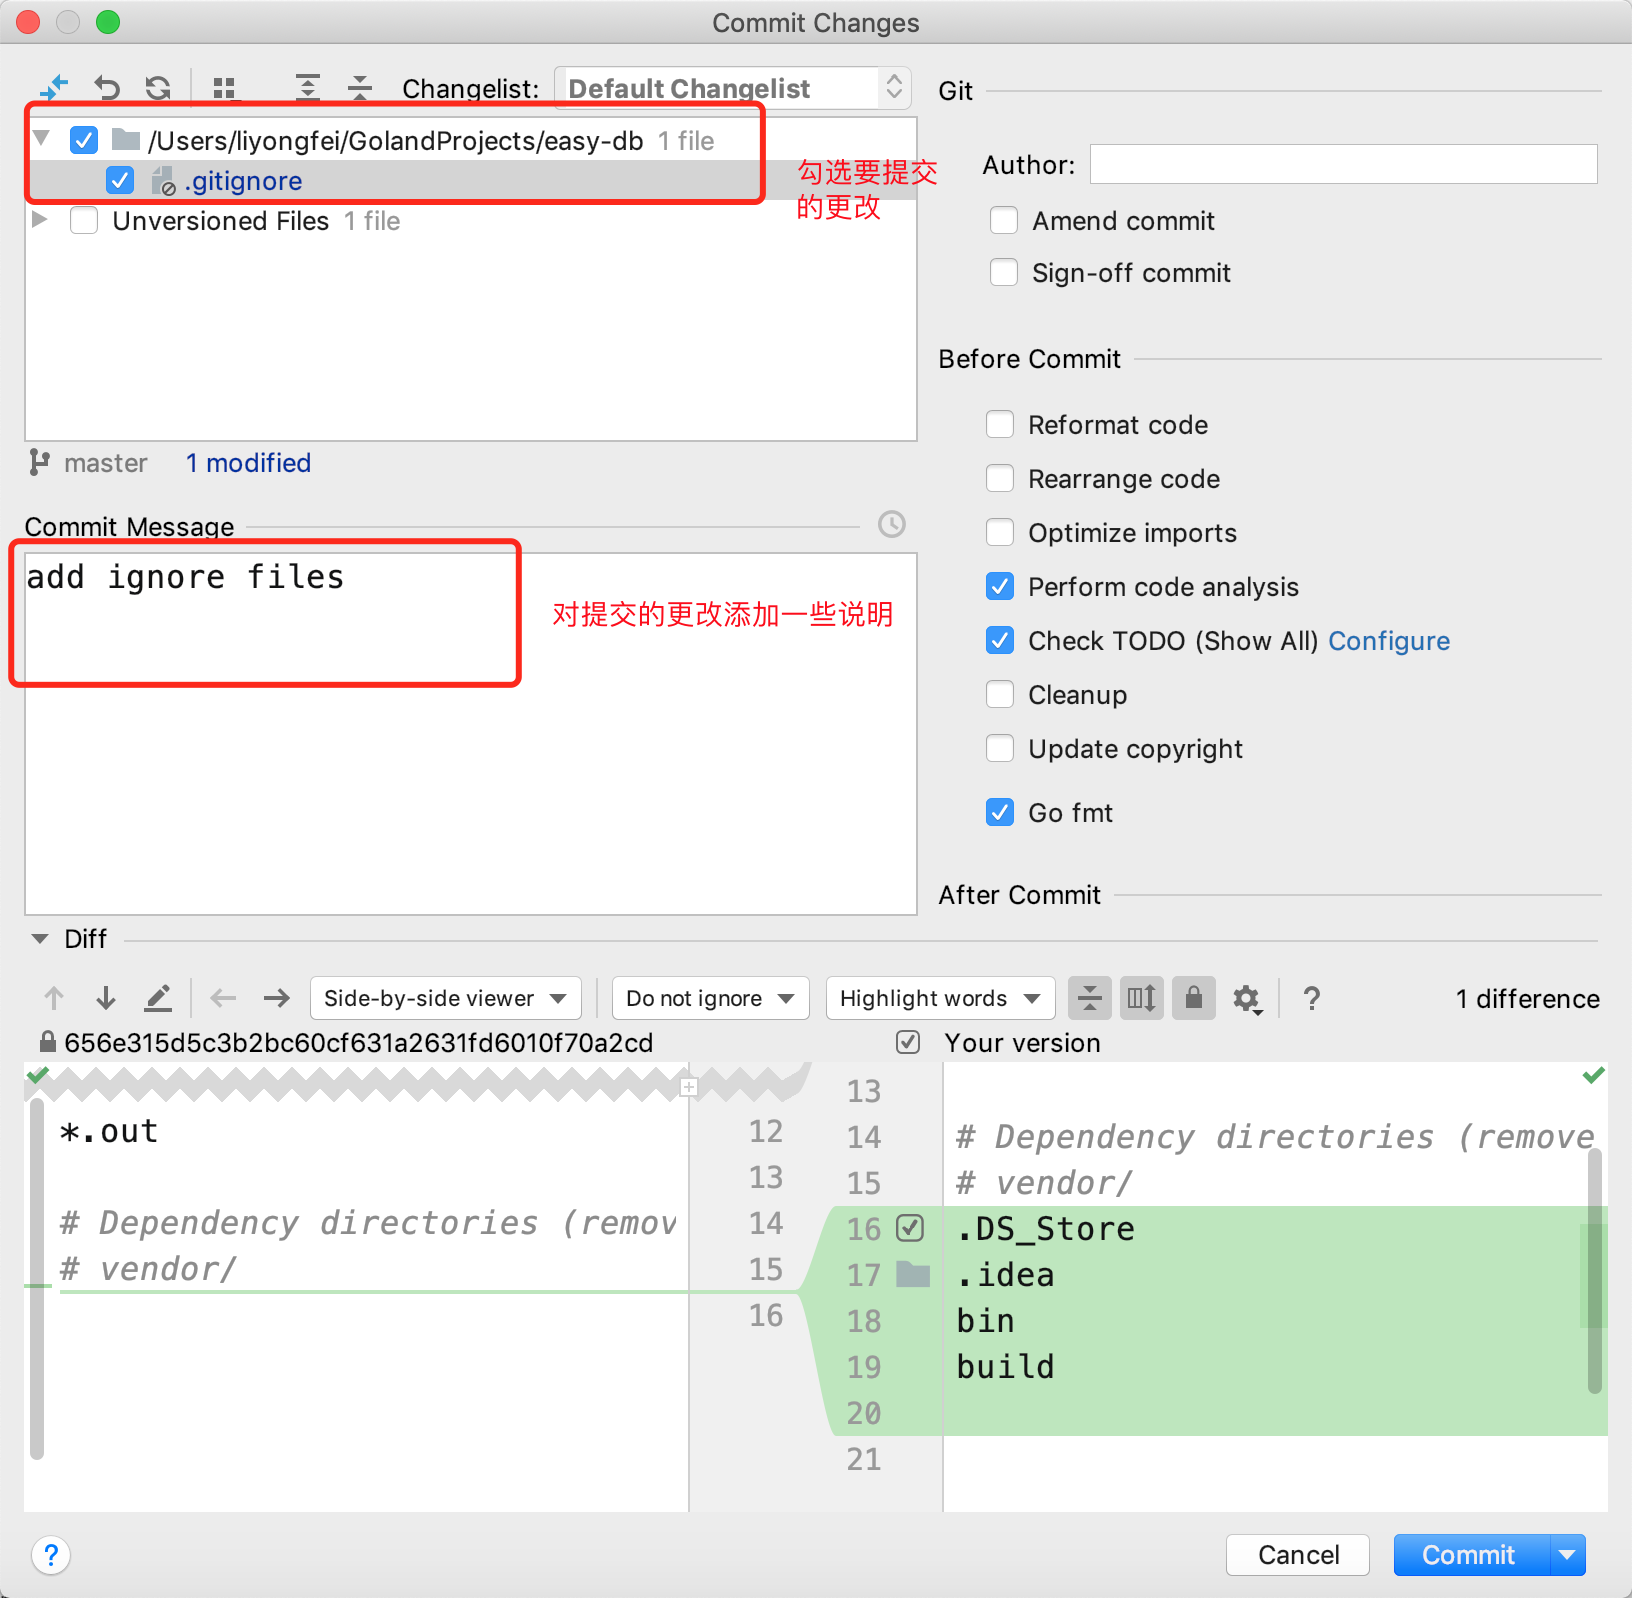
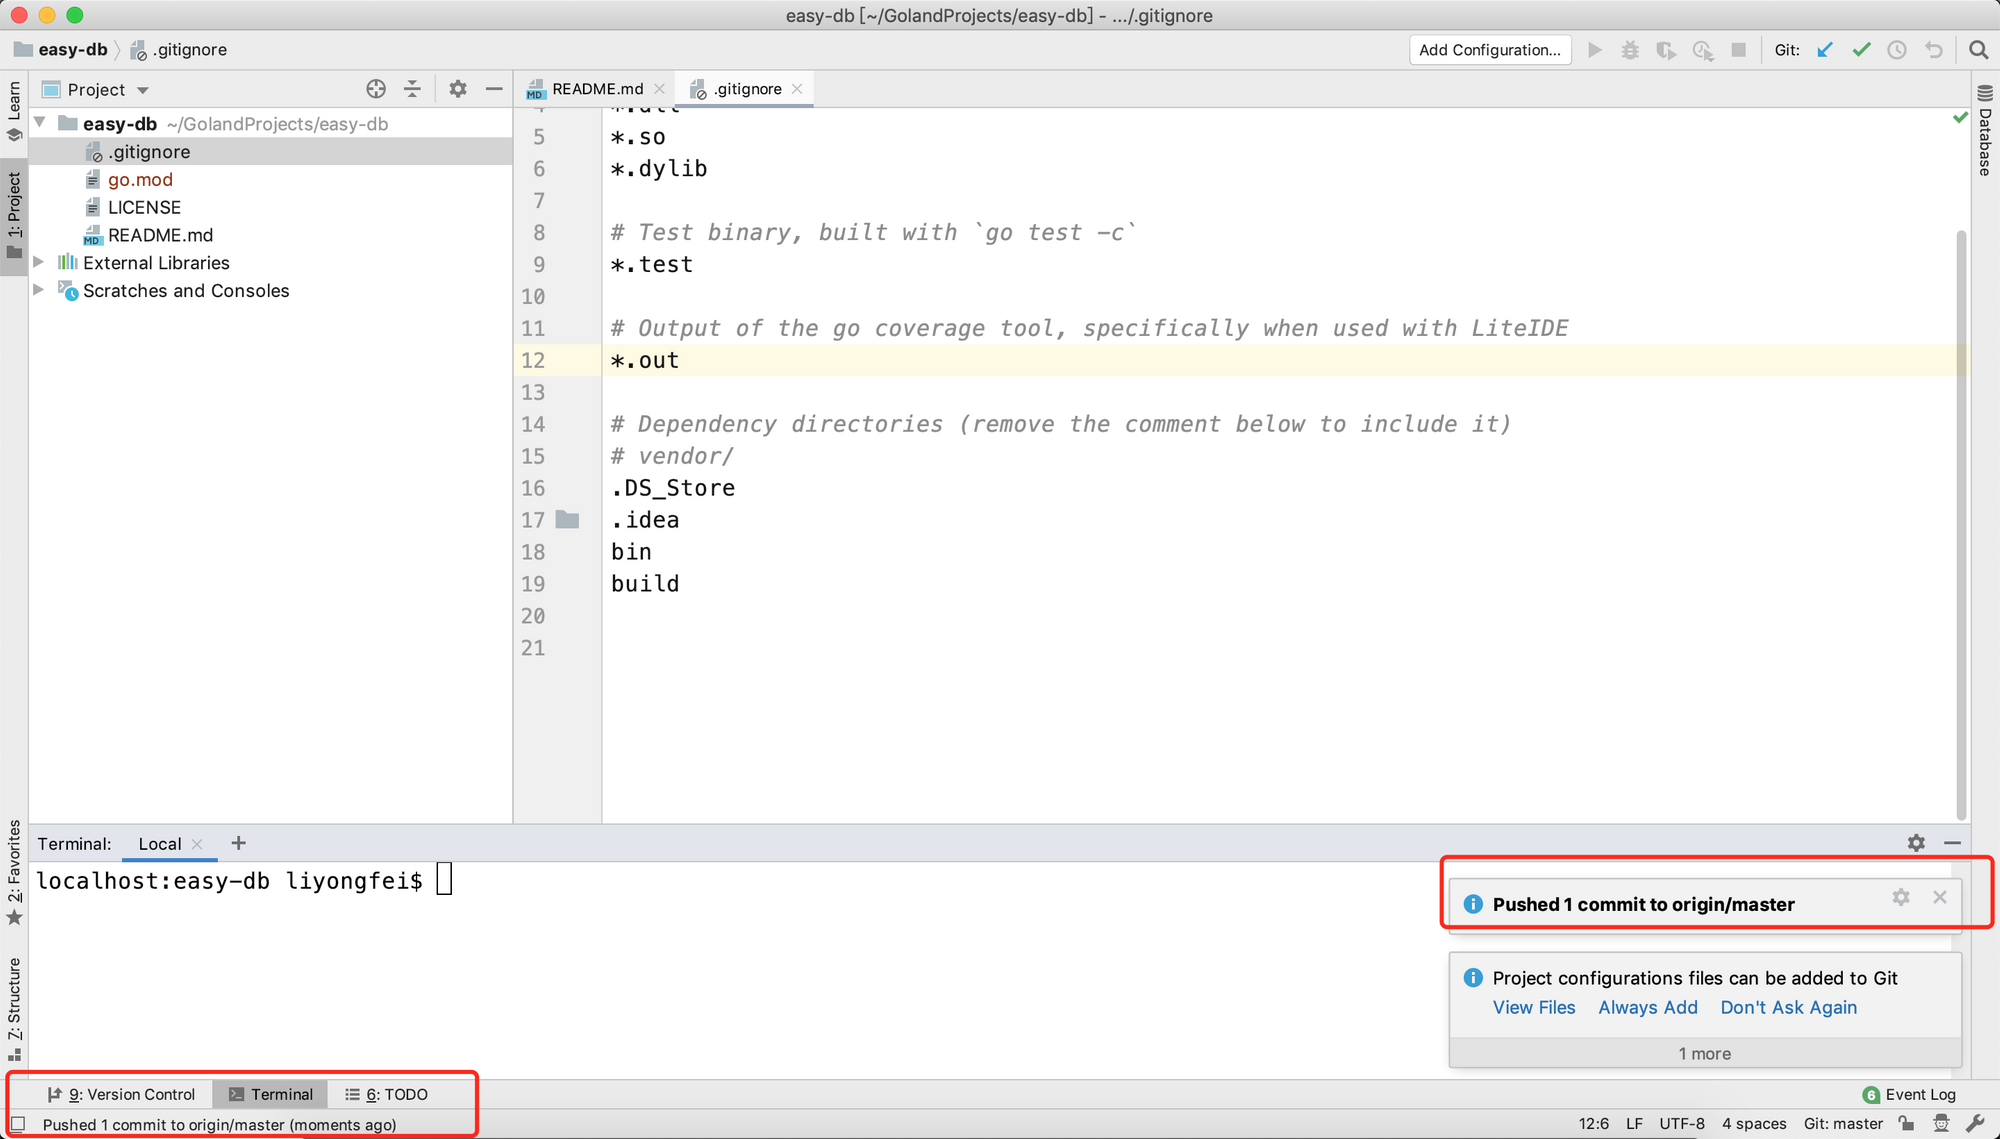
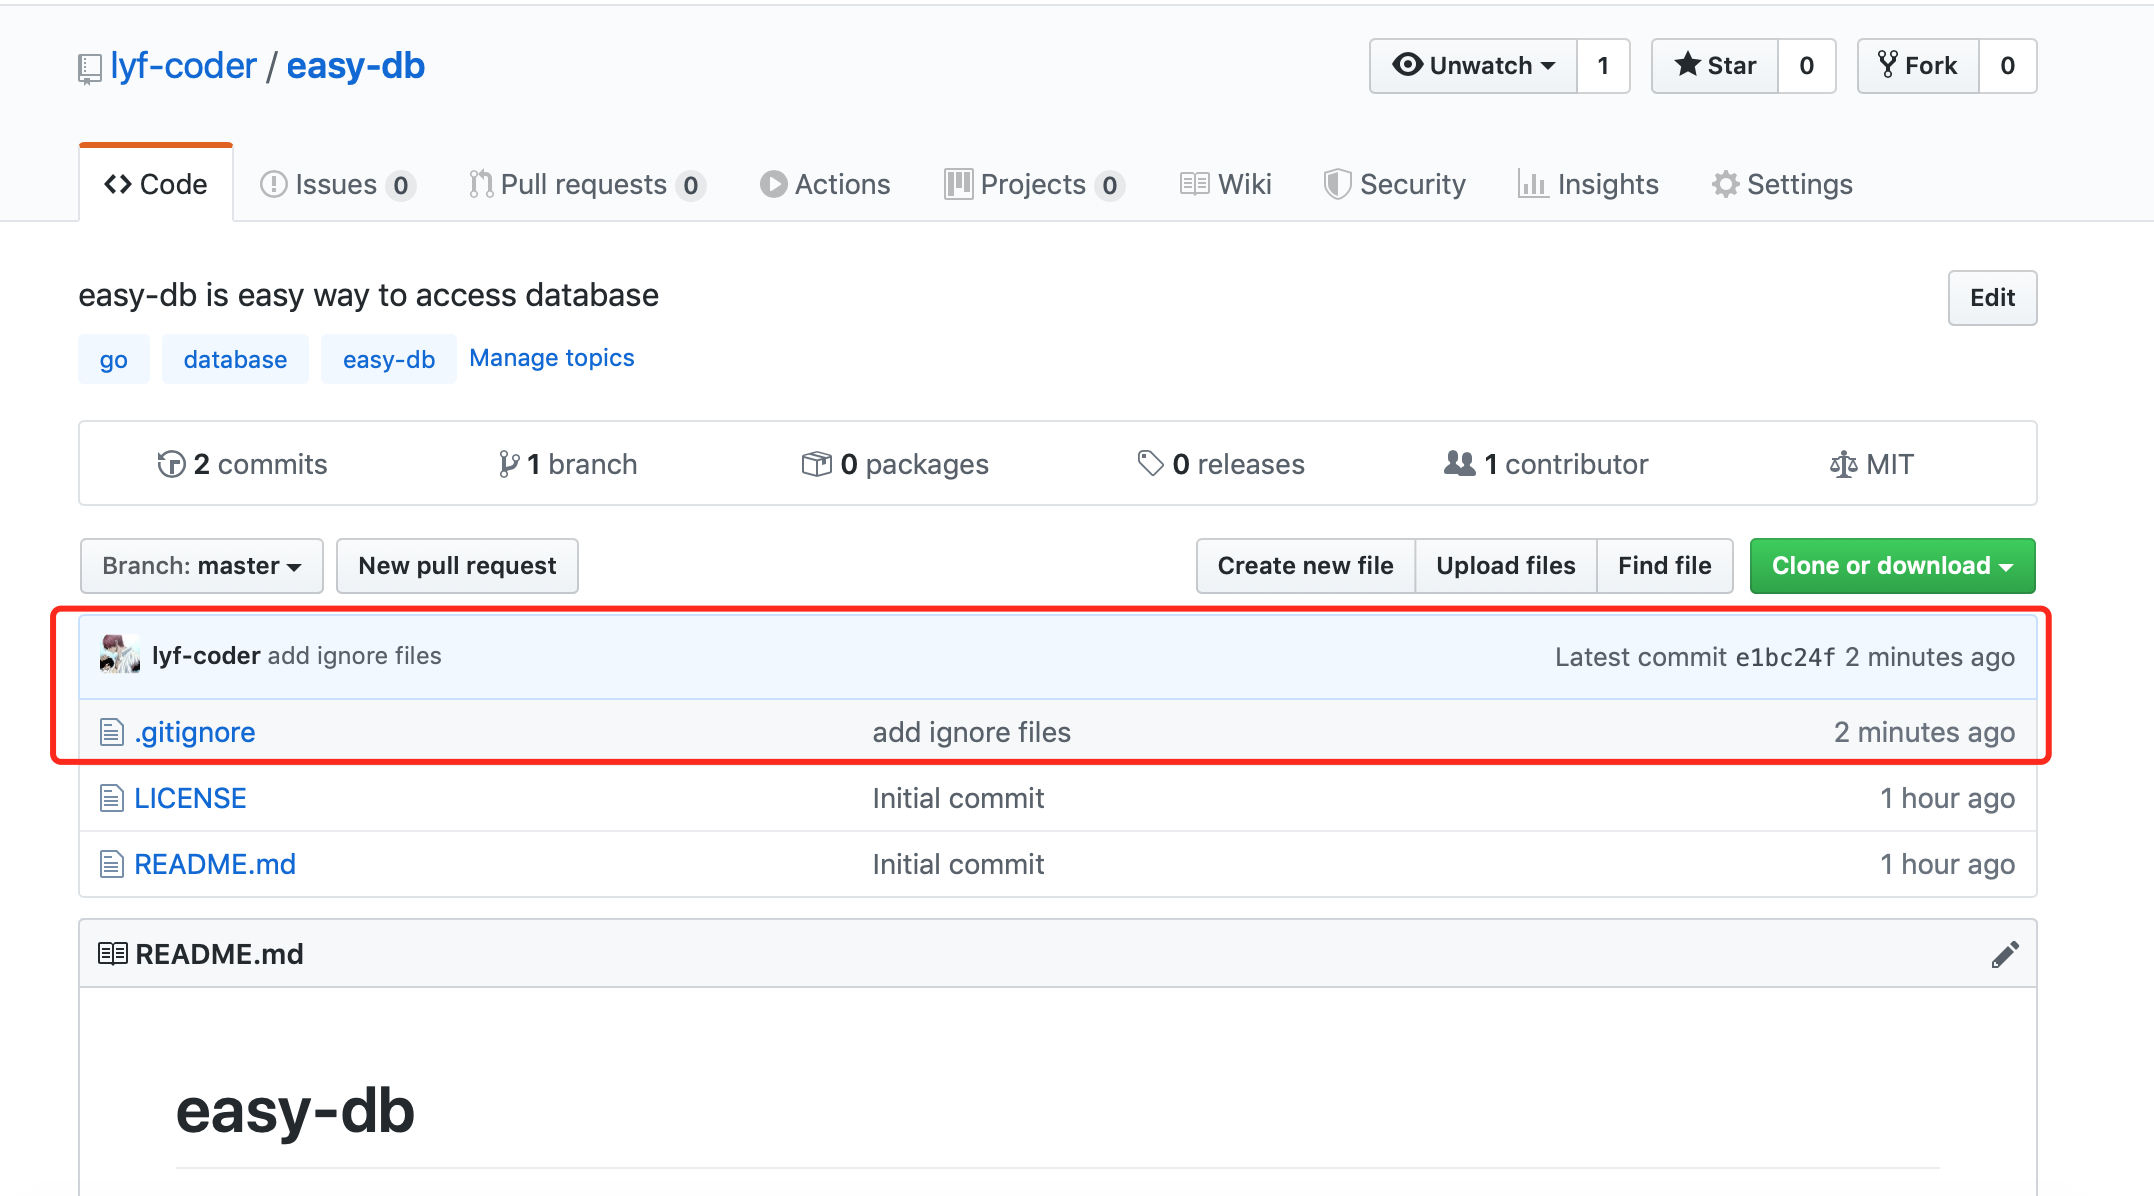
.gitignore进行配置,添加一些不需要git跟踪的目录及文件
- 利用
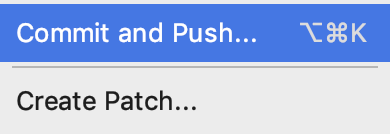
Goland的工具提交并推送文件(也可以直接在命令行进行操作:git status查看修改的文件有哪些;git add .gitignore添加要提交的更改;git commit -m "add ignore files"添加注释并提交更改到本地库;git push推送本地库的更改到Github对应项目库)
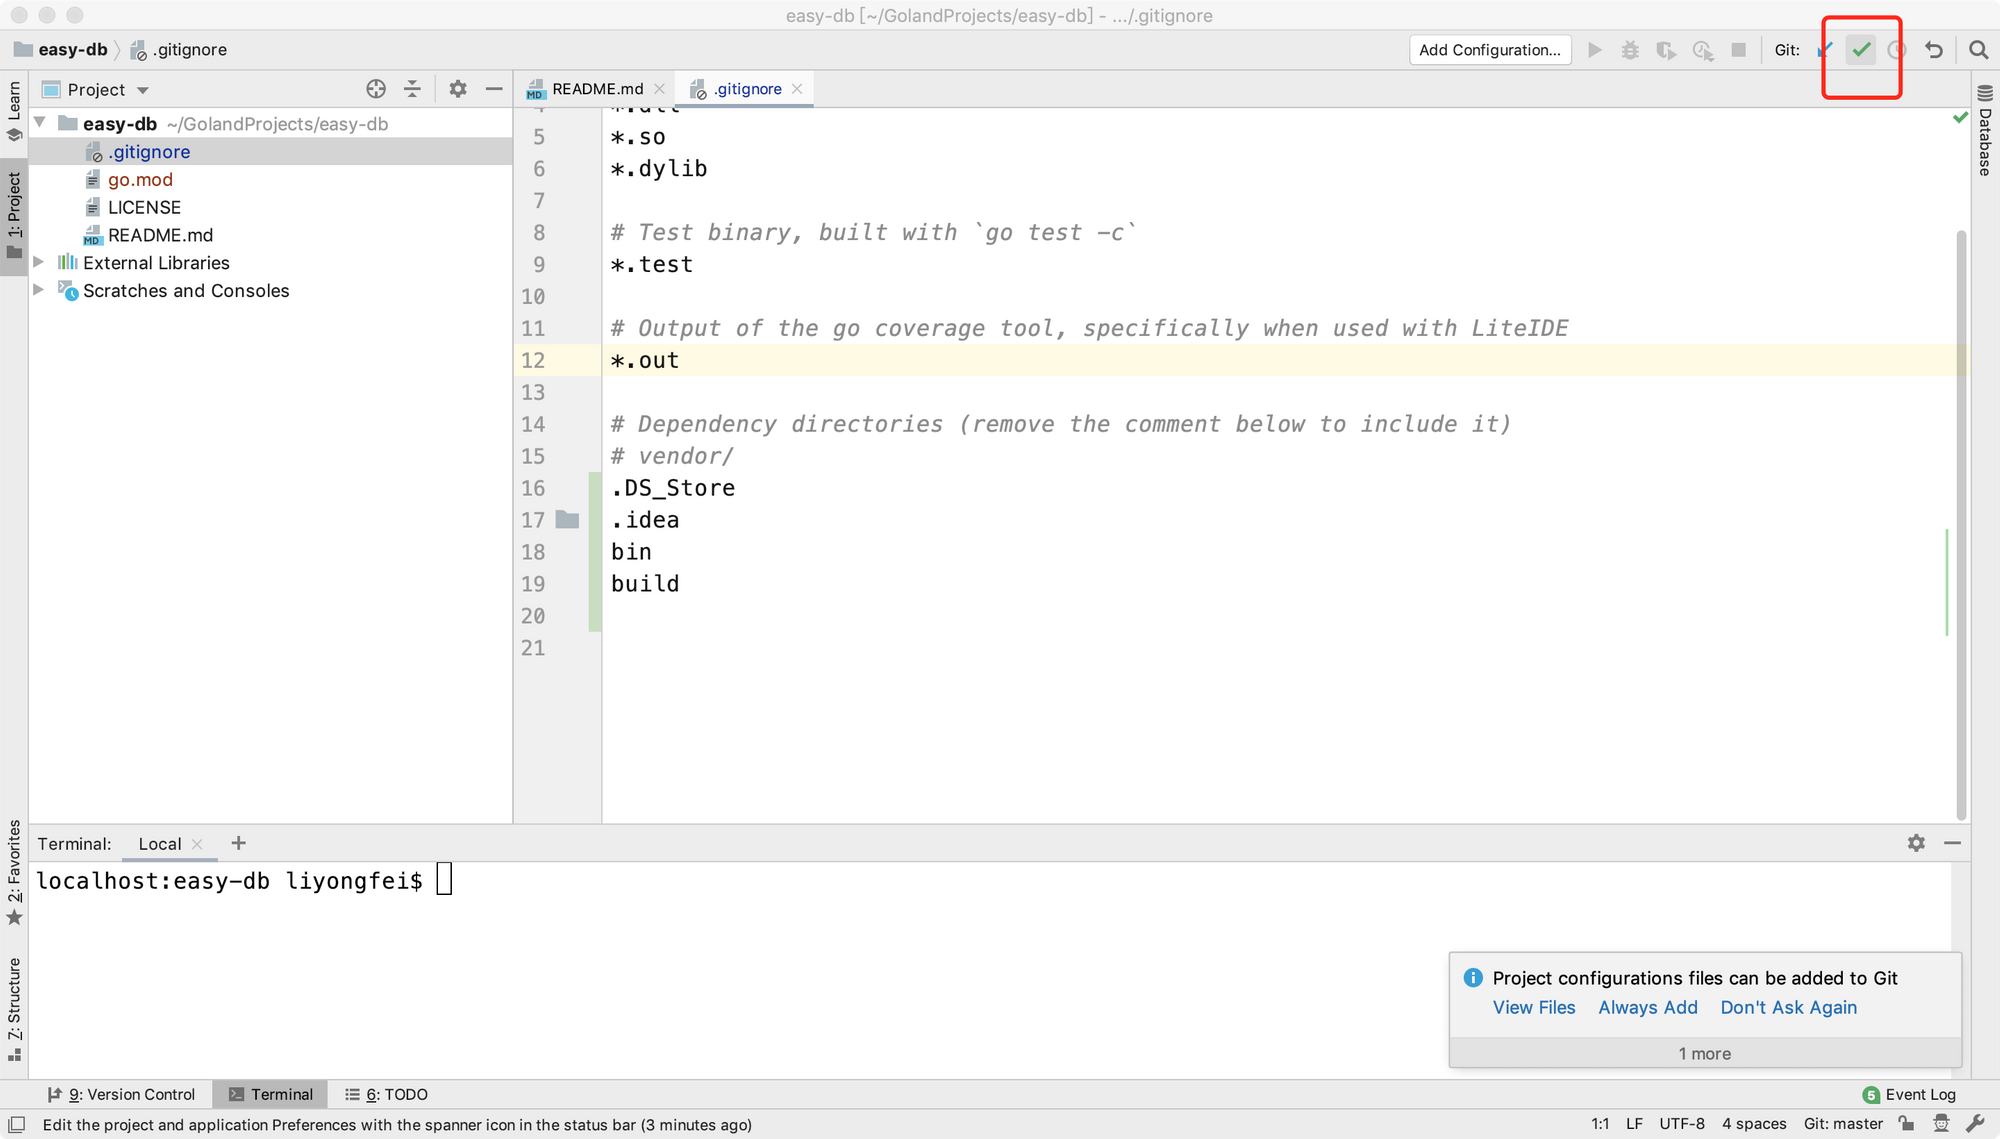

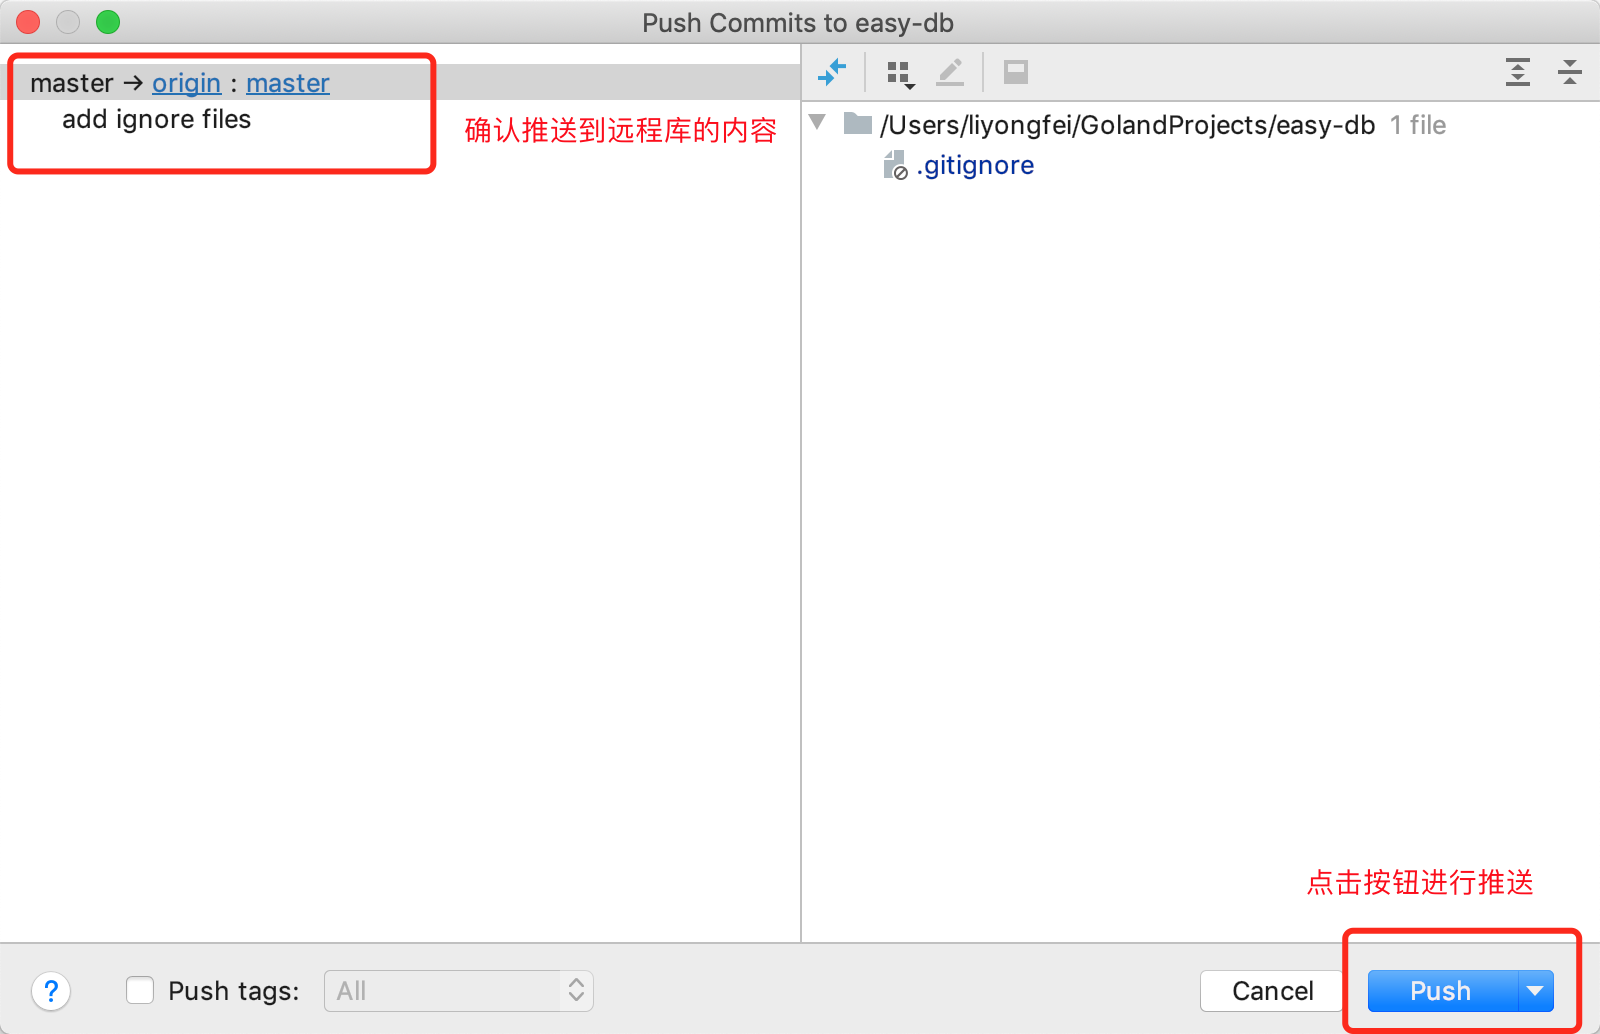
- 查看推送状态
- 同理推送其他修改
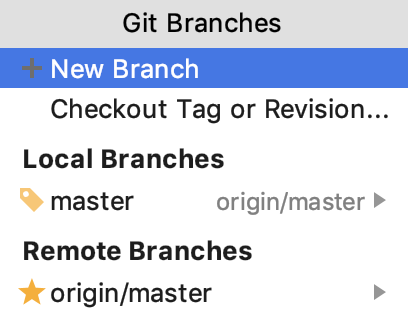
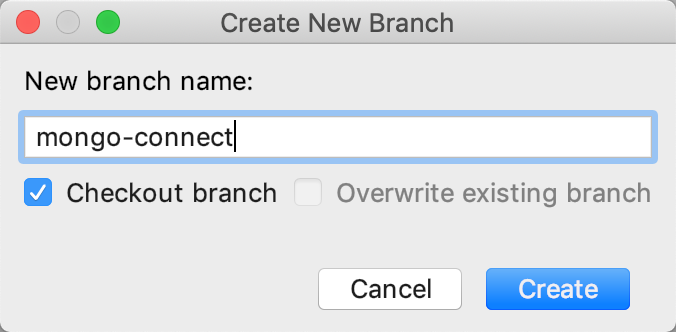
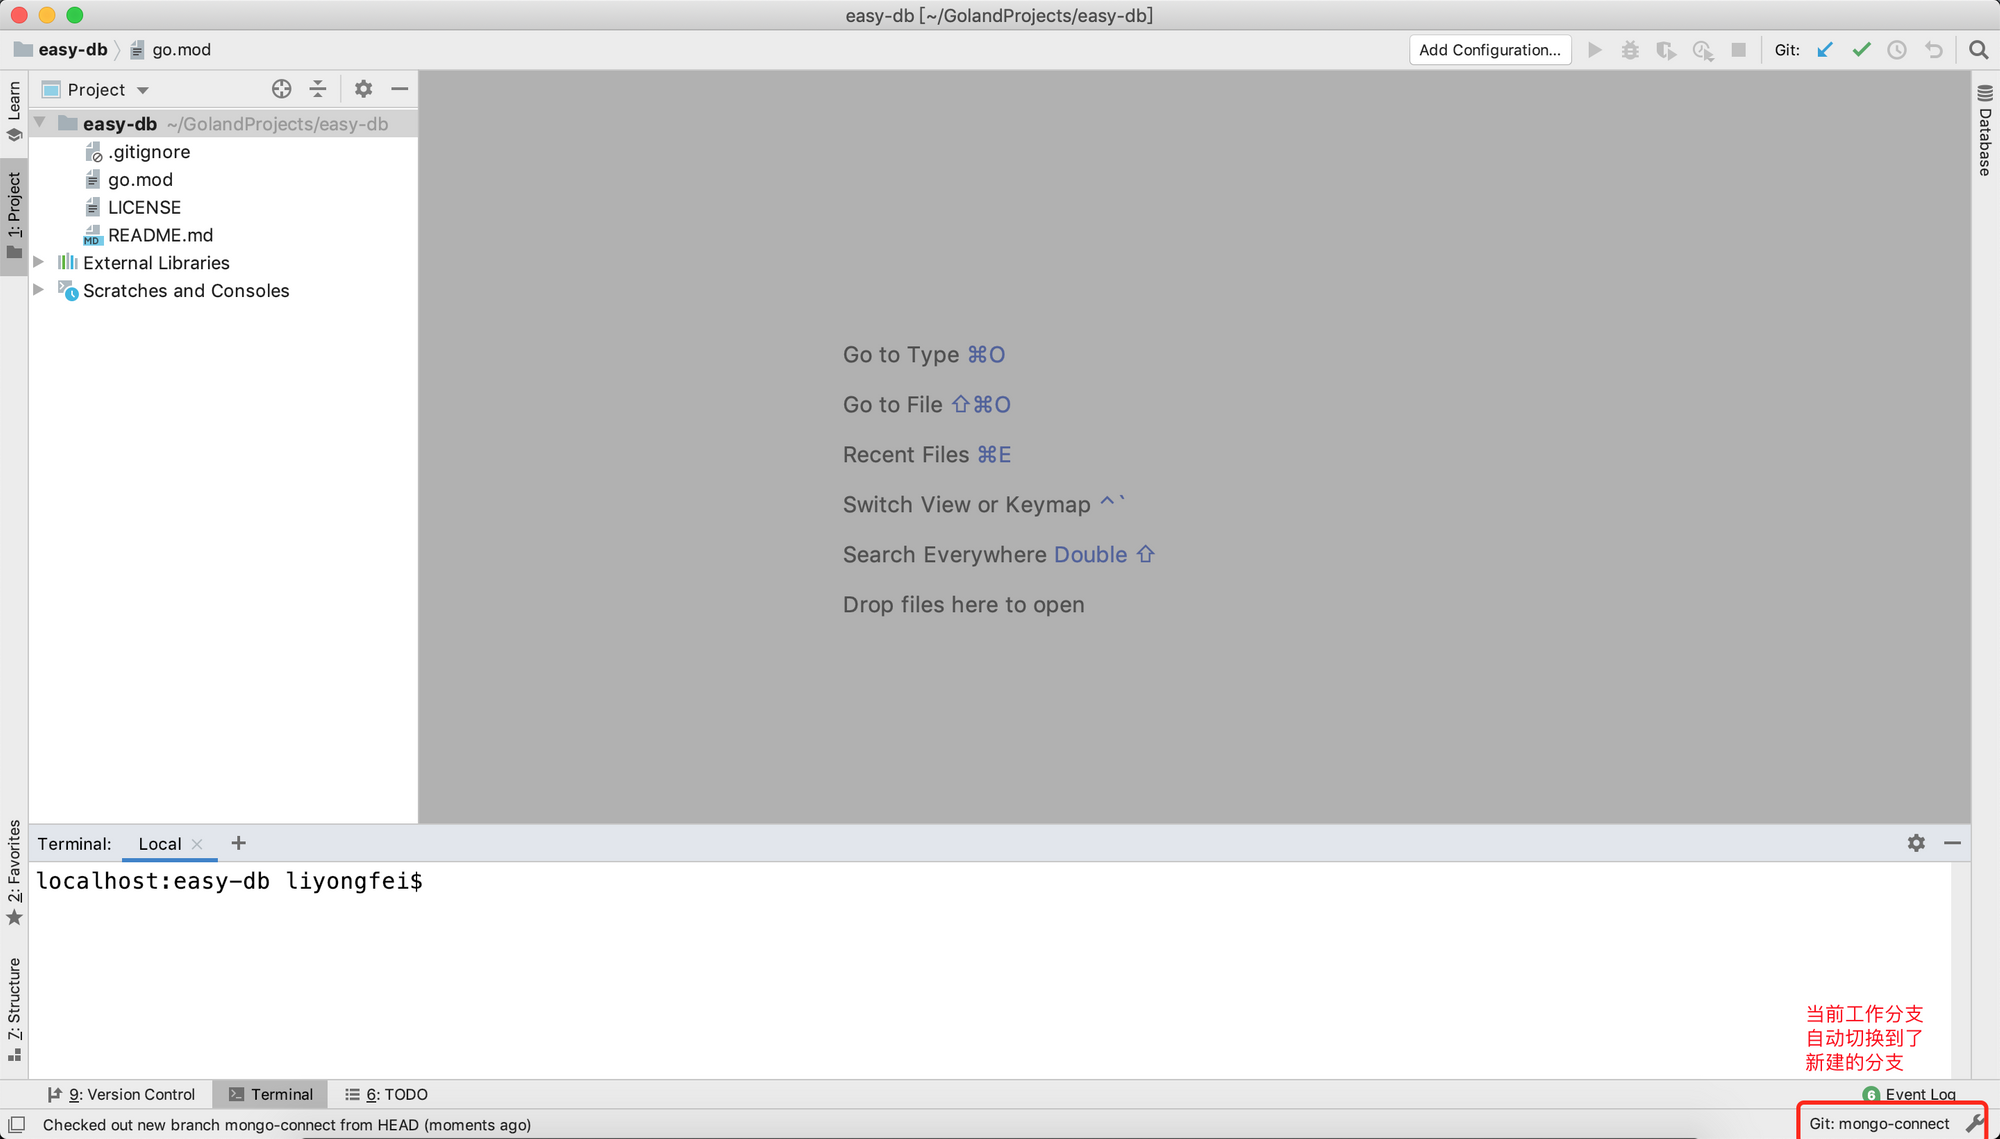
- 创建工作分支,这里我创建一个要实现
mongo数据库连接功能的分支mongo-connect(有多种方式可以创建git分支,具体可自行搜索,这里直接使用最方便的一种方式)

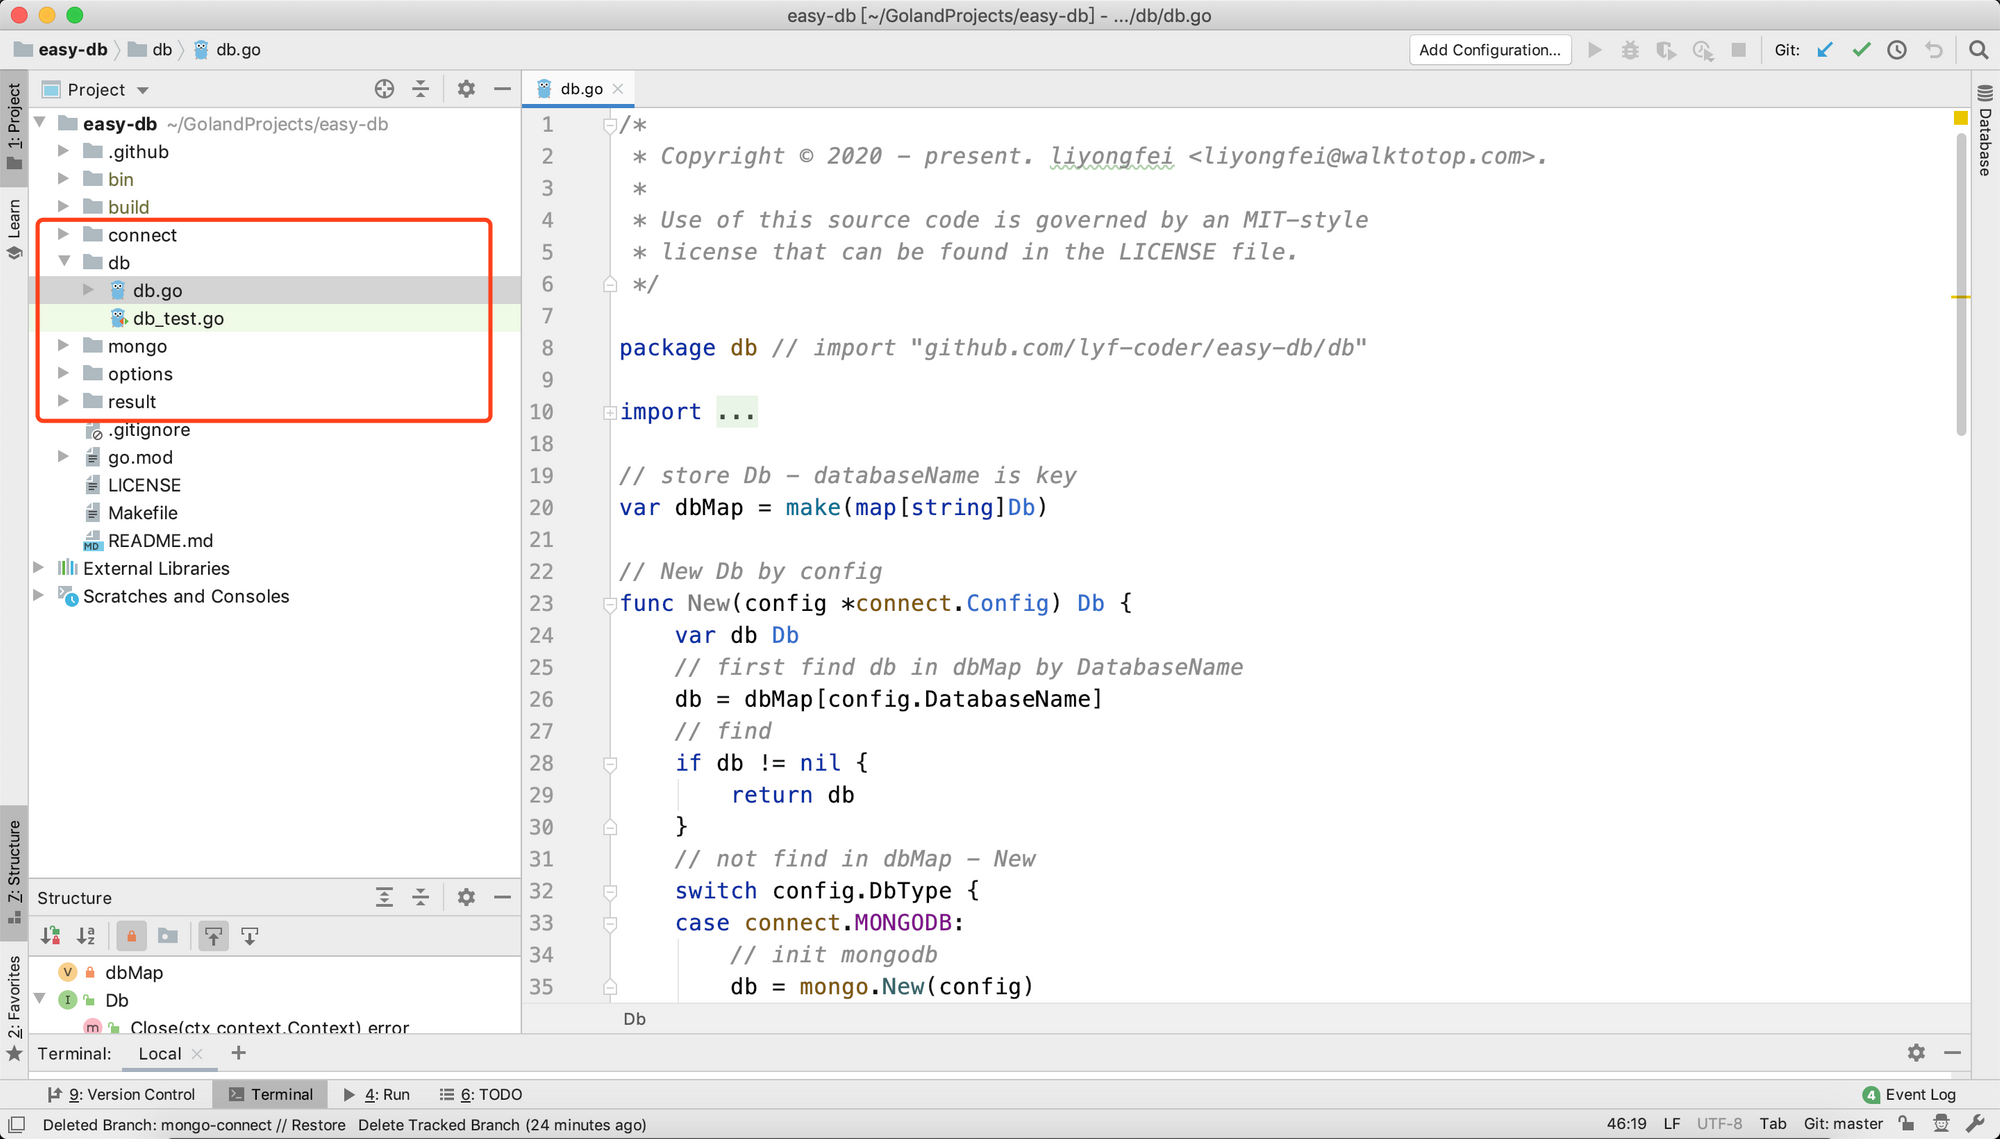
- 因为开发的这个项目只是作为一个工具包发布给别的项目使用,所以不需要包含主函数,而且因为
easy-db项目定位是对数据库相关的操作进行封装,数据库有多种,这里要先实现的是mongo数据库的封装,因此会先创建一个mongo目录,目录下的模块名也就是mongo,在这个目录下直接创建一个mongo.go文件进行具体功能实现。(可提前配置一下Copyright,添加一下Makefile文件,配置Goland环境,添加Github流程配置,还可以了解使用一下Github的Projects与Issues进行项目进度的管理)
- 开发完成后需要提交开发分支
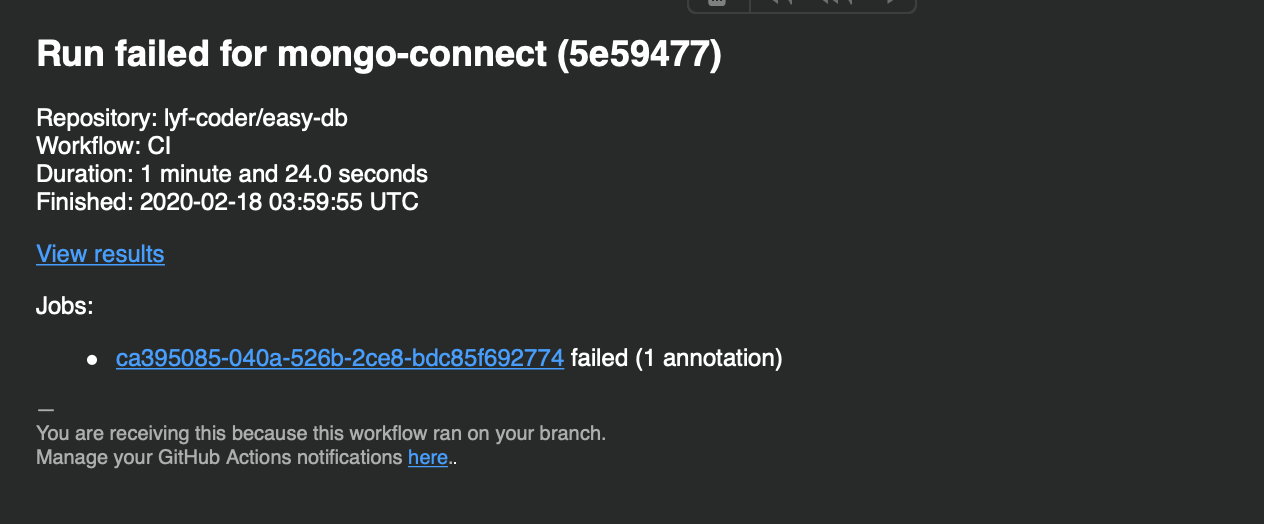
mongo-connect,在Github-easy-db界面可以看到提交的分支以及操作按钮可以直接对比分支的修改以及创建合并请求,然后进行合并到master,最后删除开发分支 - 在项目的
Actions可以看到流程是否正常执行,一般要是失败会自动发邮件提醒
README.md文件配置,可根据需要添加自己要说明的内容,一般应该有Actions-项目自动化流程执行情况、GoDoc-项目的接口文档(自动生成的,不用管-godoc会根据github的项目自动生成)、Go Report Card-这个到不是必须也是访问自动生成,会对项目代码进行分析评分,根据评分结果修改不规范的地方,还应该有个使用的说明,效果如下
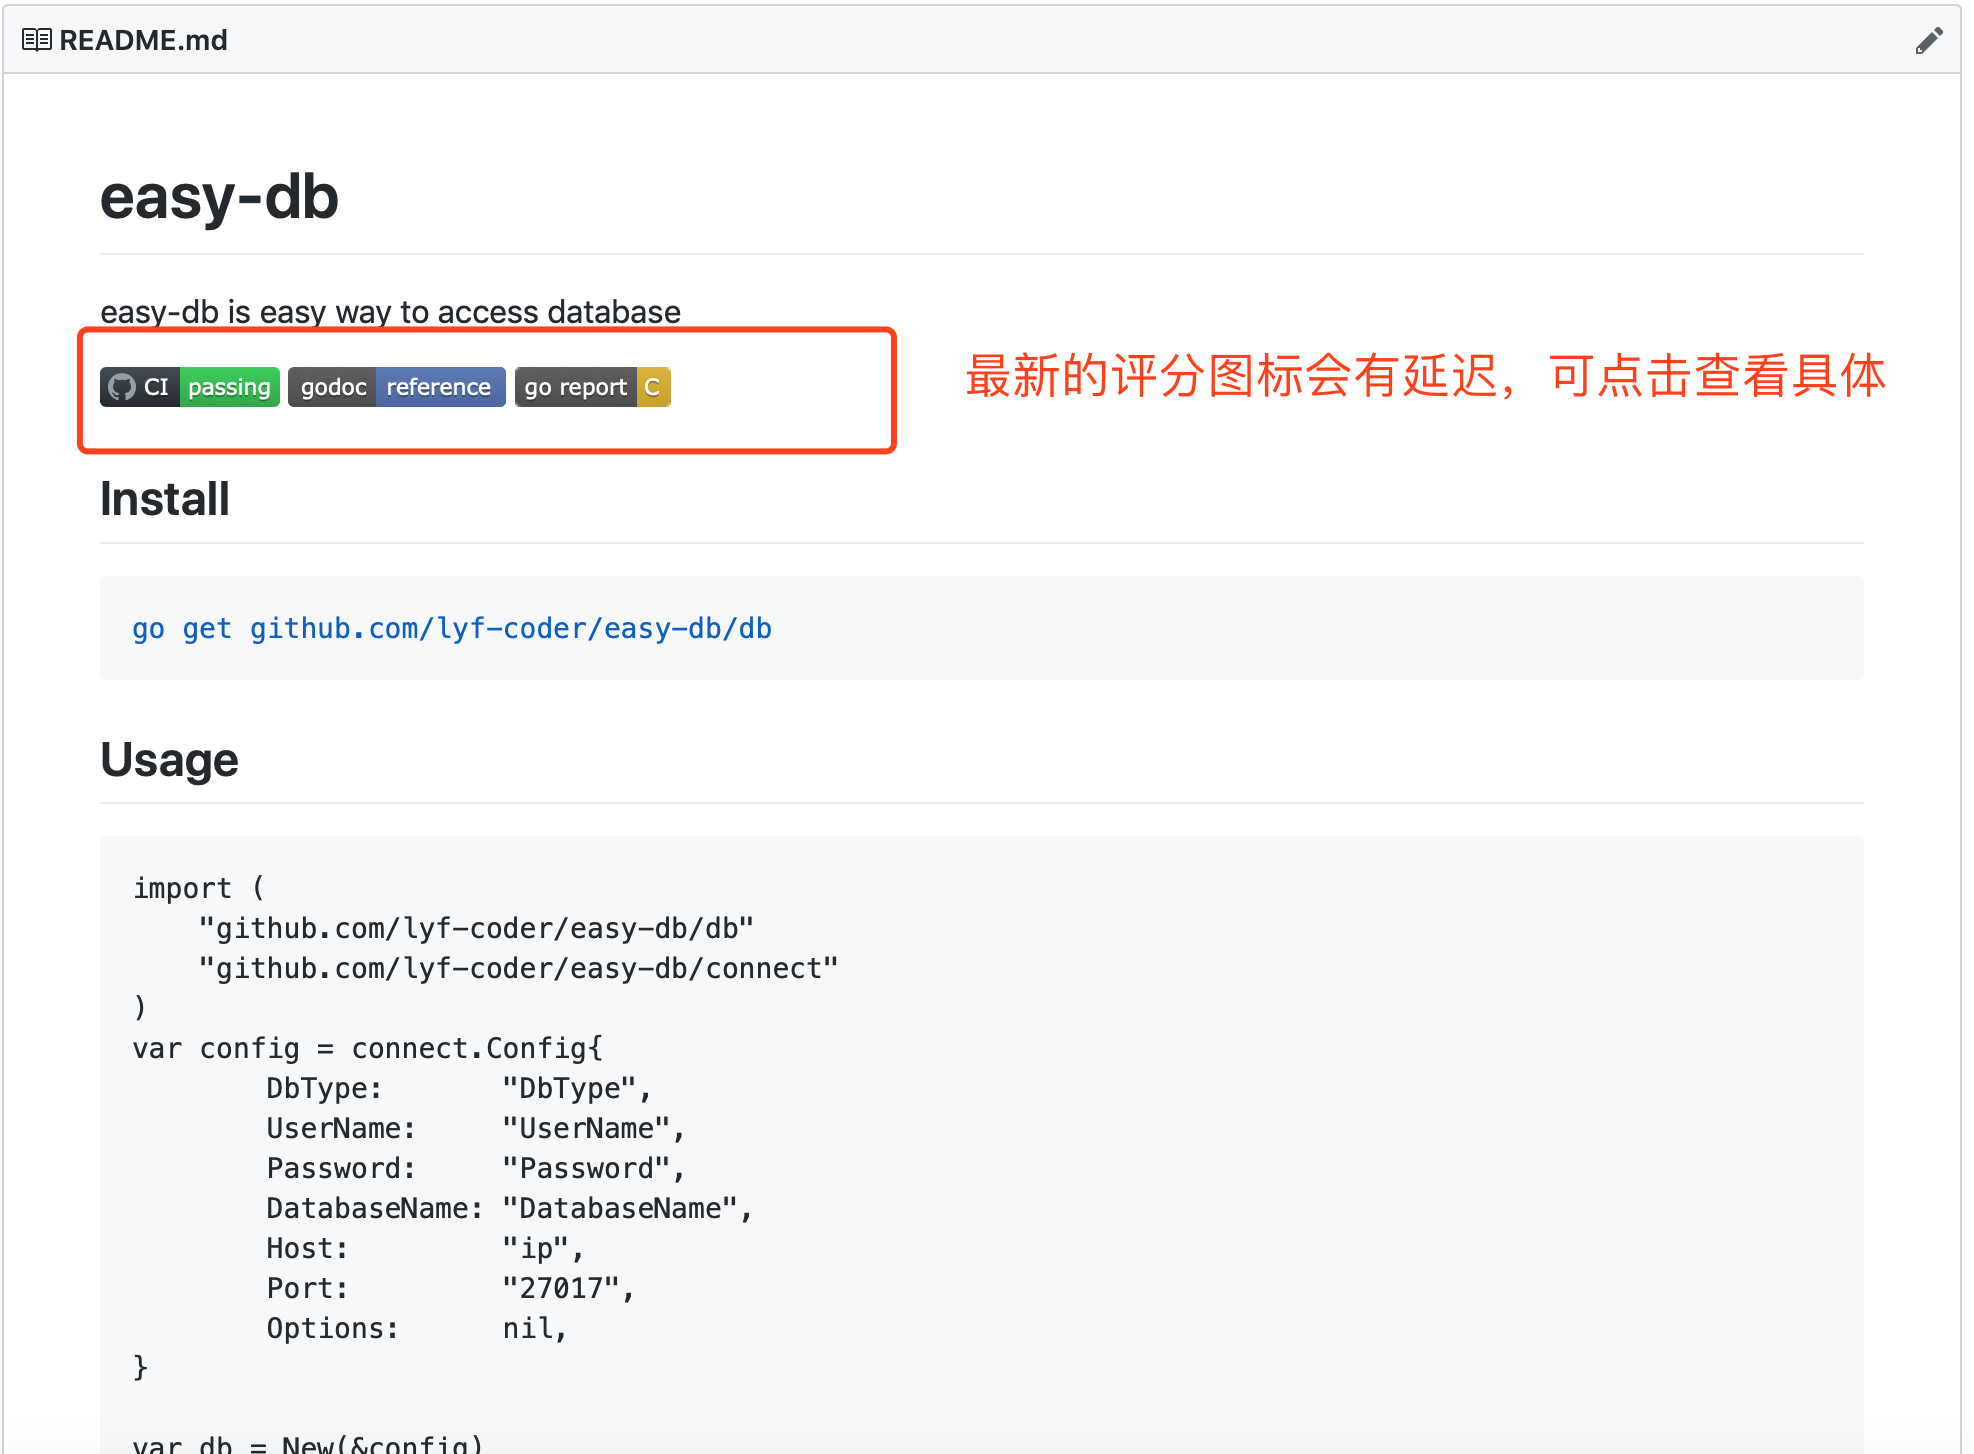
# easy-db
easy-db is easy way to access database
[](https://github.com/lyf-coder/easy-db/actions?query=workflow%3ACI)
[](https://godoc.org/github.com/lyf-coder/easy-db)
[](https://goreportcard.com/report/github.com/lyf-coder/easy-db)
## Install
```console
go get github.com/lyf-coder/easy-db/db
```
## Usage
import (
"github.com/lyf-coder/easy-db/db"
"github.com/lyf-coder/easy-db/connect"
)
var config = connect.Config{
DbType: "DbType",
UserName: "UserName",
Password: "Password",
DatabaseName: "DatabaseName",
Host: "ip",
Port: "27017",
Options: nil,
}
var db = New(&config)
// exec Db interface func - 项目开发完成后进行版本发布,本地切换到
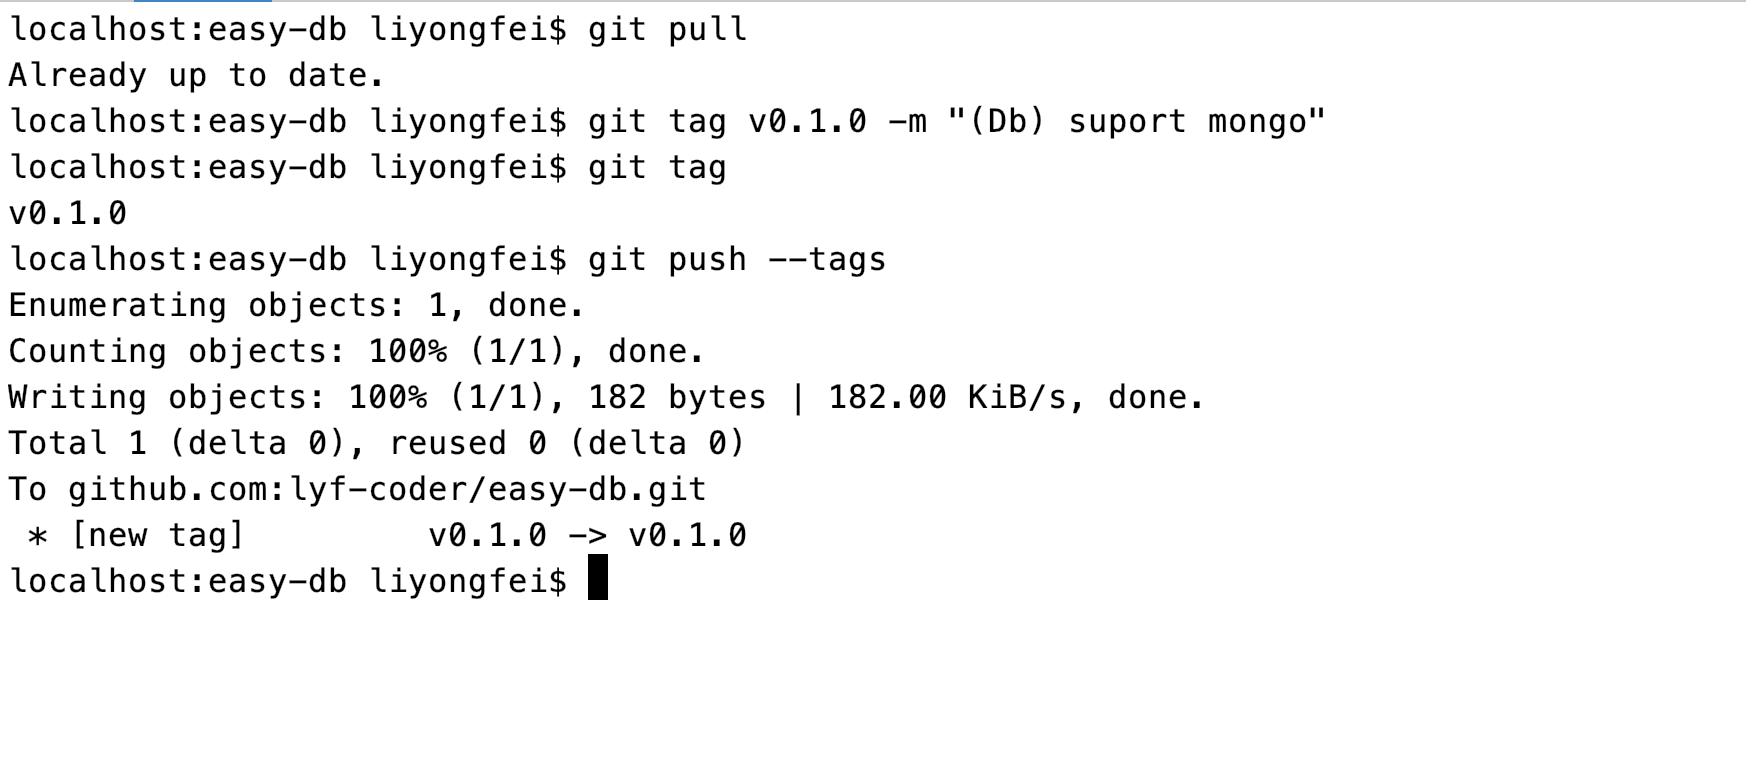
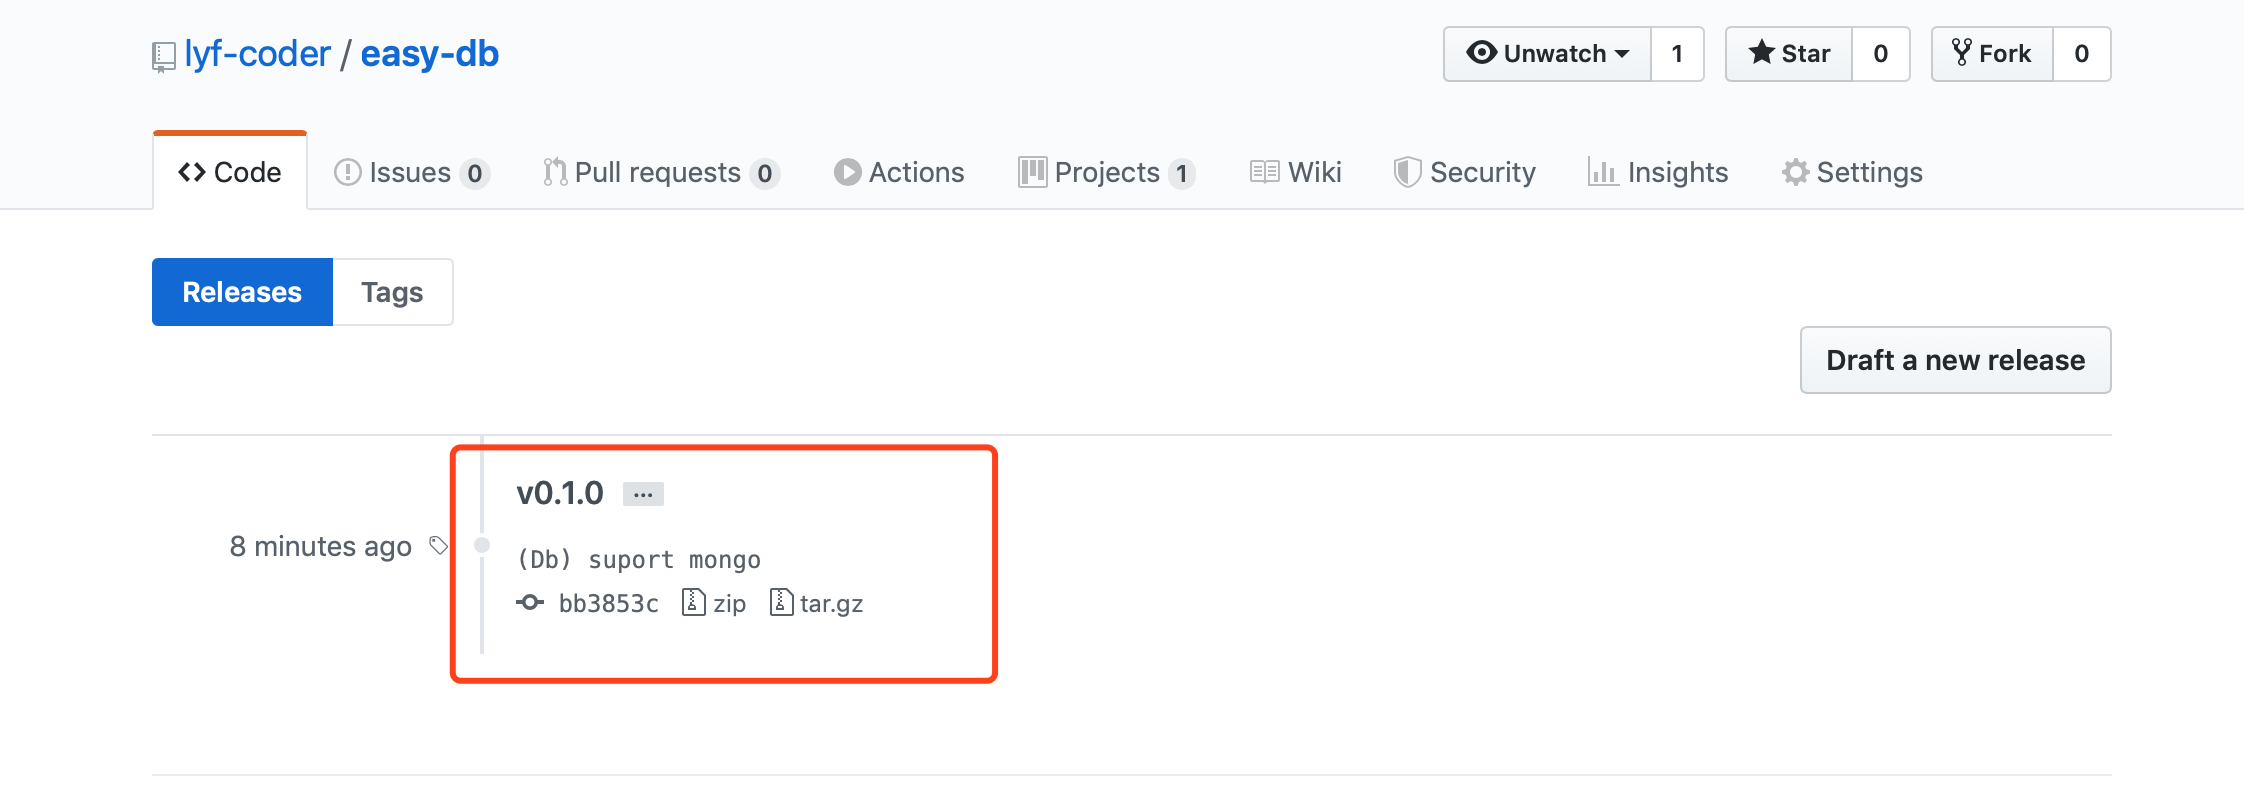
master分支并git pull最新代码,然后进行版本操作:git tag v0.1.0 -m "(Db) suport mongo"(版本号一般是三位,第一位是大版本-当接口修改等不兼容或比较大的更改时增加;第二位是特性版本-一般是增加某个功能时增加;第三位是bug版本-当修复bug时增加),go项目的版本一般就是根据tag进行管理。打完tag版本号后进行推送:git push --tags(也可以具体推送某个tag,这里是为了省事,直接把都推送到远程仓库了)
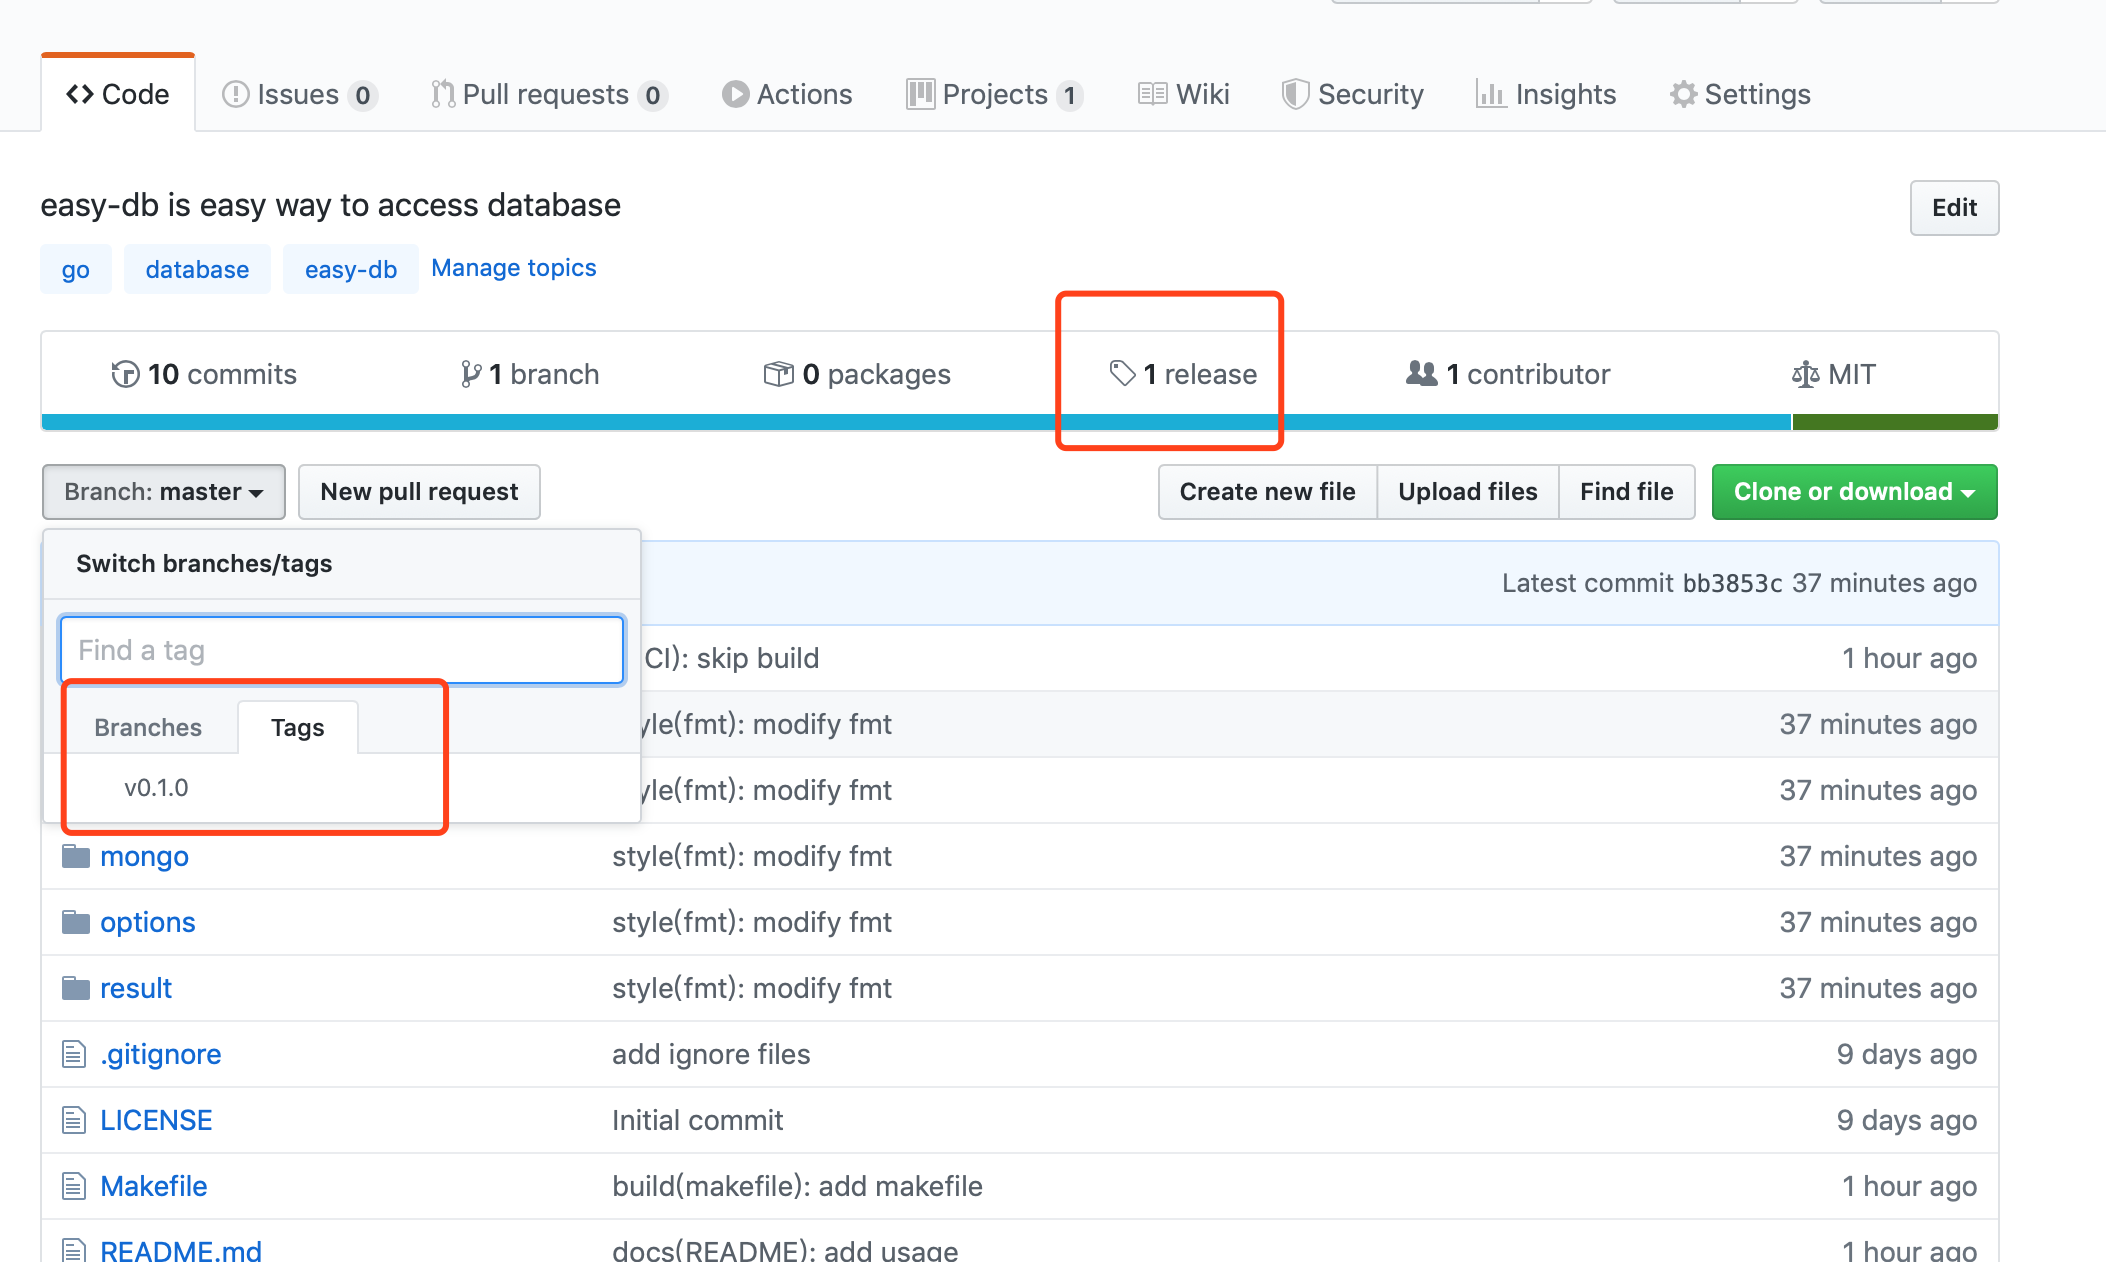
- 后续开发就可以不断迭代版本,这里会有版本记录,另外一般引入的包都是最新的版本,也可以指定版本,如:
go get github.com/lyf-coder/entity@v1.2.0,对于Goland可以直接在go.mod文件中修改版本然后保存,会自动同步版本,对于其他需要同步的可以使用go mod tidy命令,会根据go.mod下载依赖
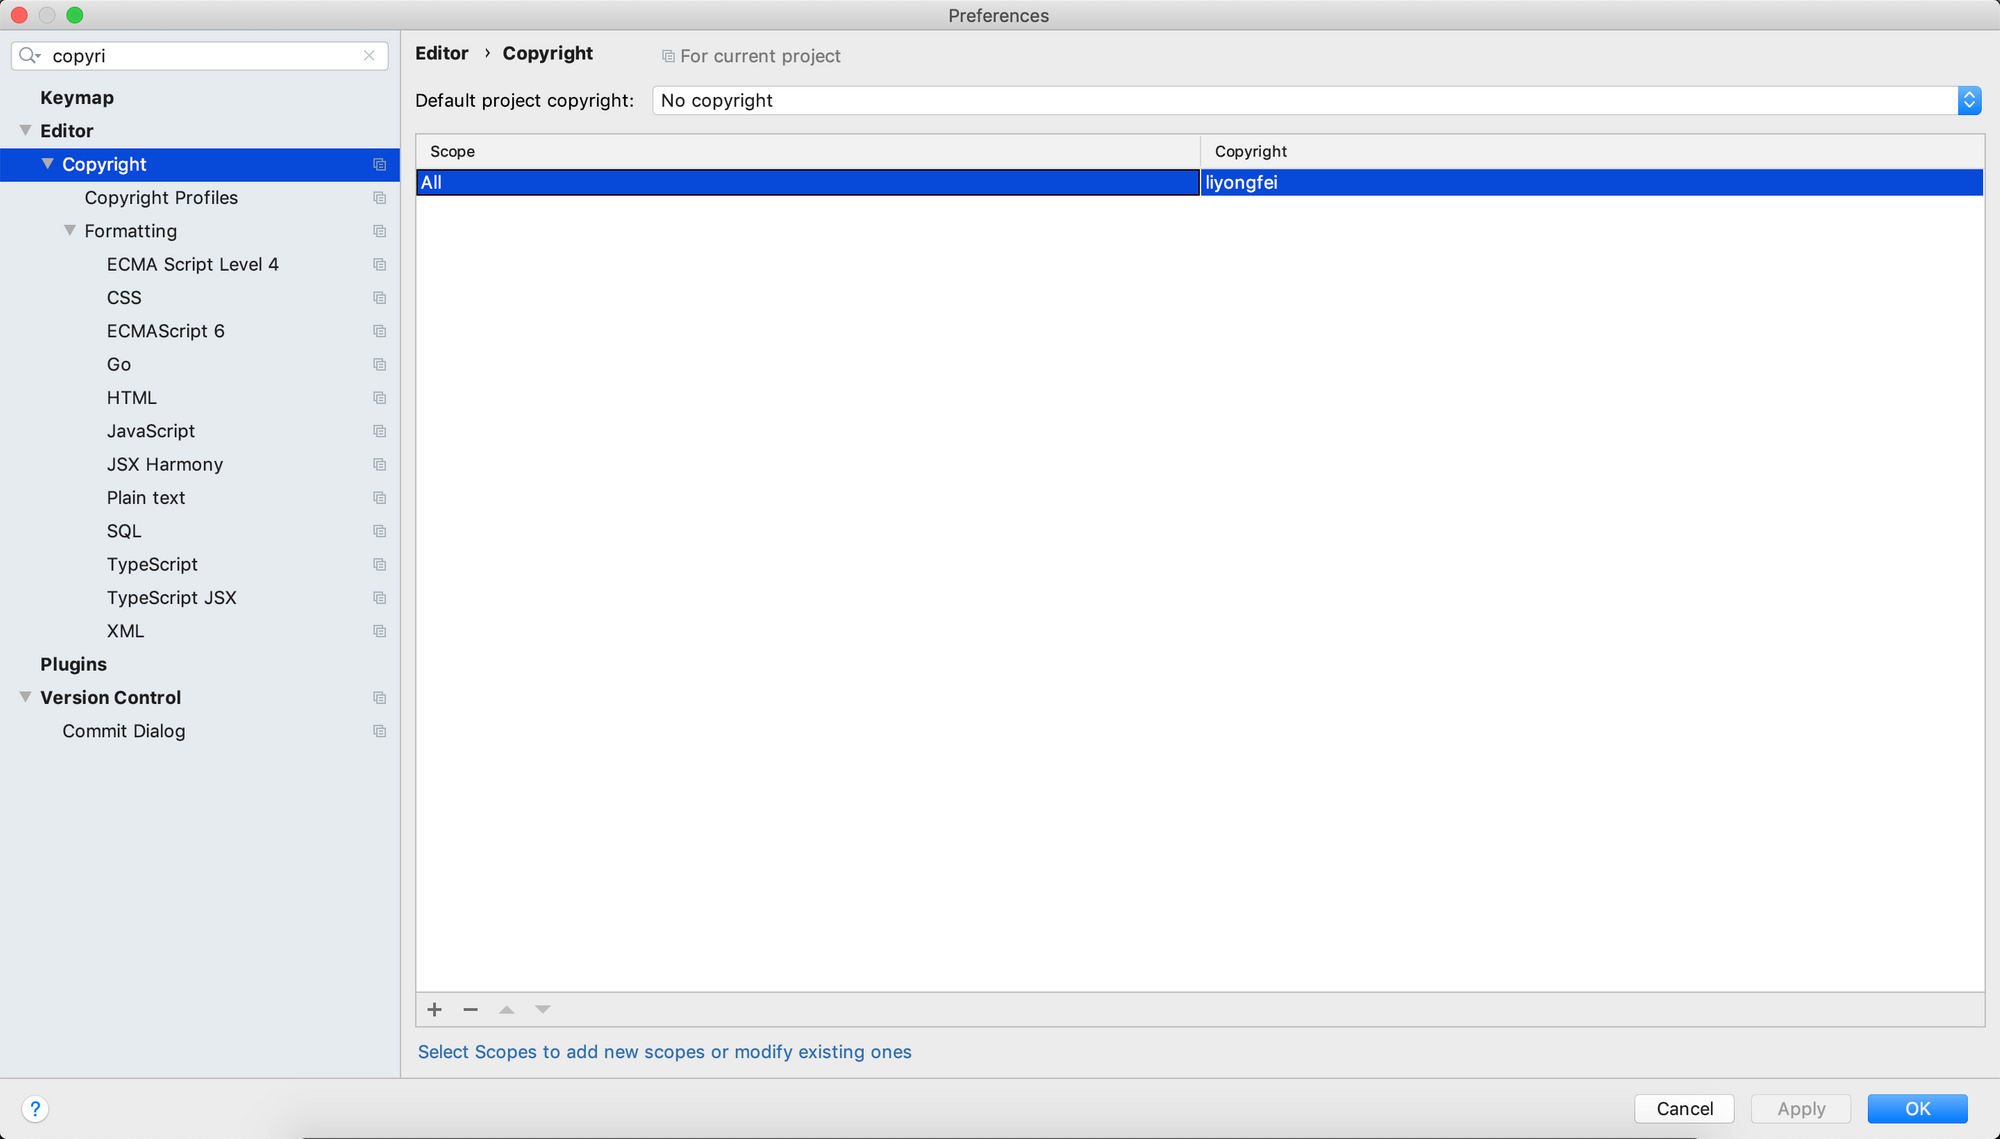
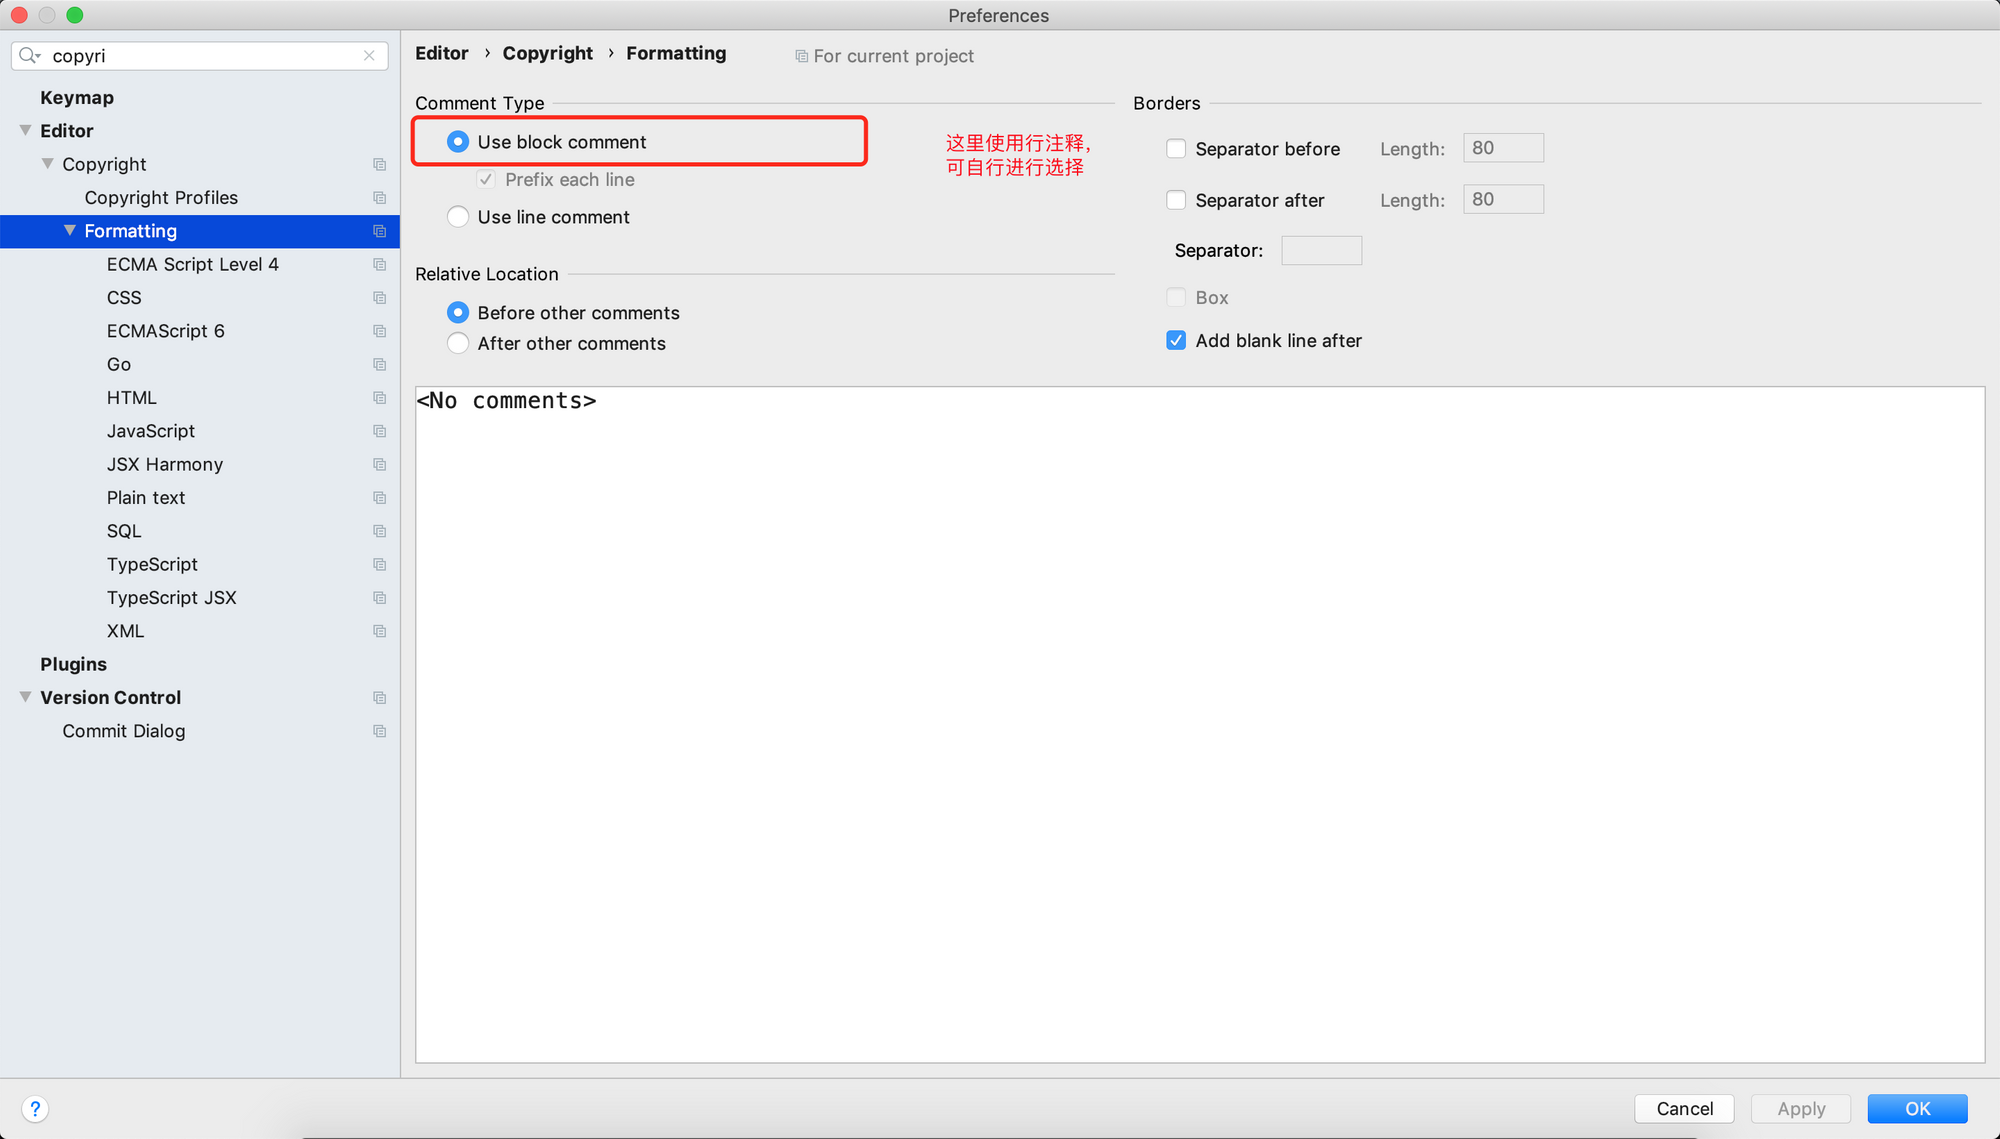
Copyright 配置
Preferences -> Editor -> Copyright -> Copyright Profiles
Copyright © $today.year - present. liyongfei <liyongfei@walktotop.com>.

Use of this source code is governed by an MIT-style
license that can be found in the LICENSE file.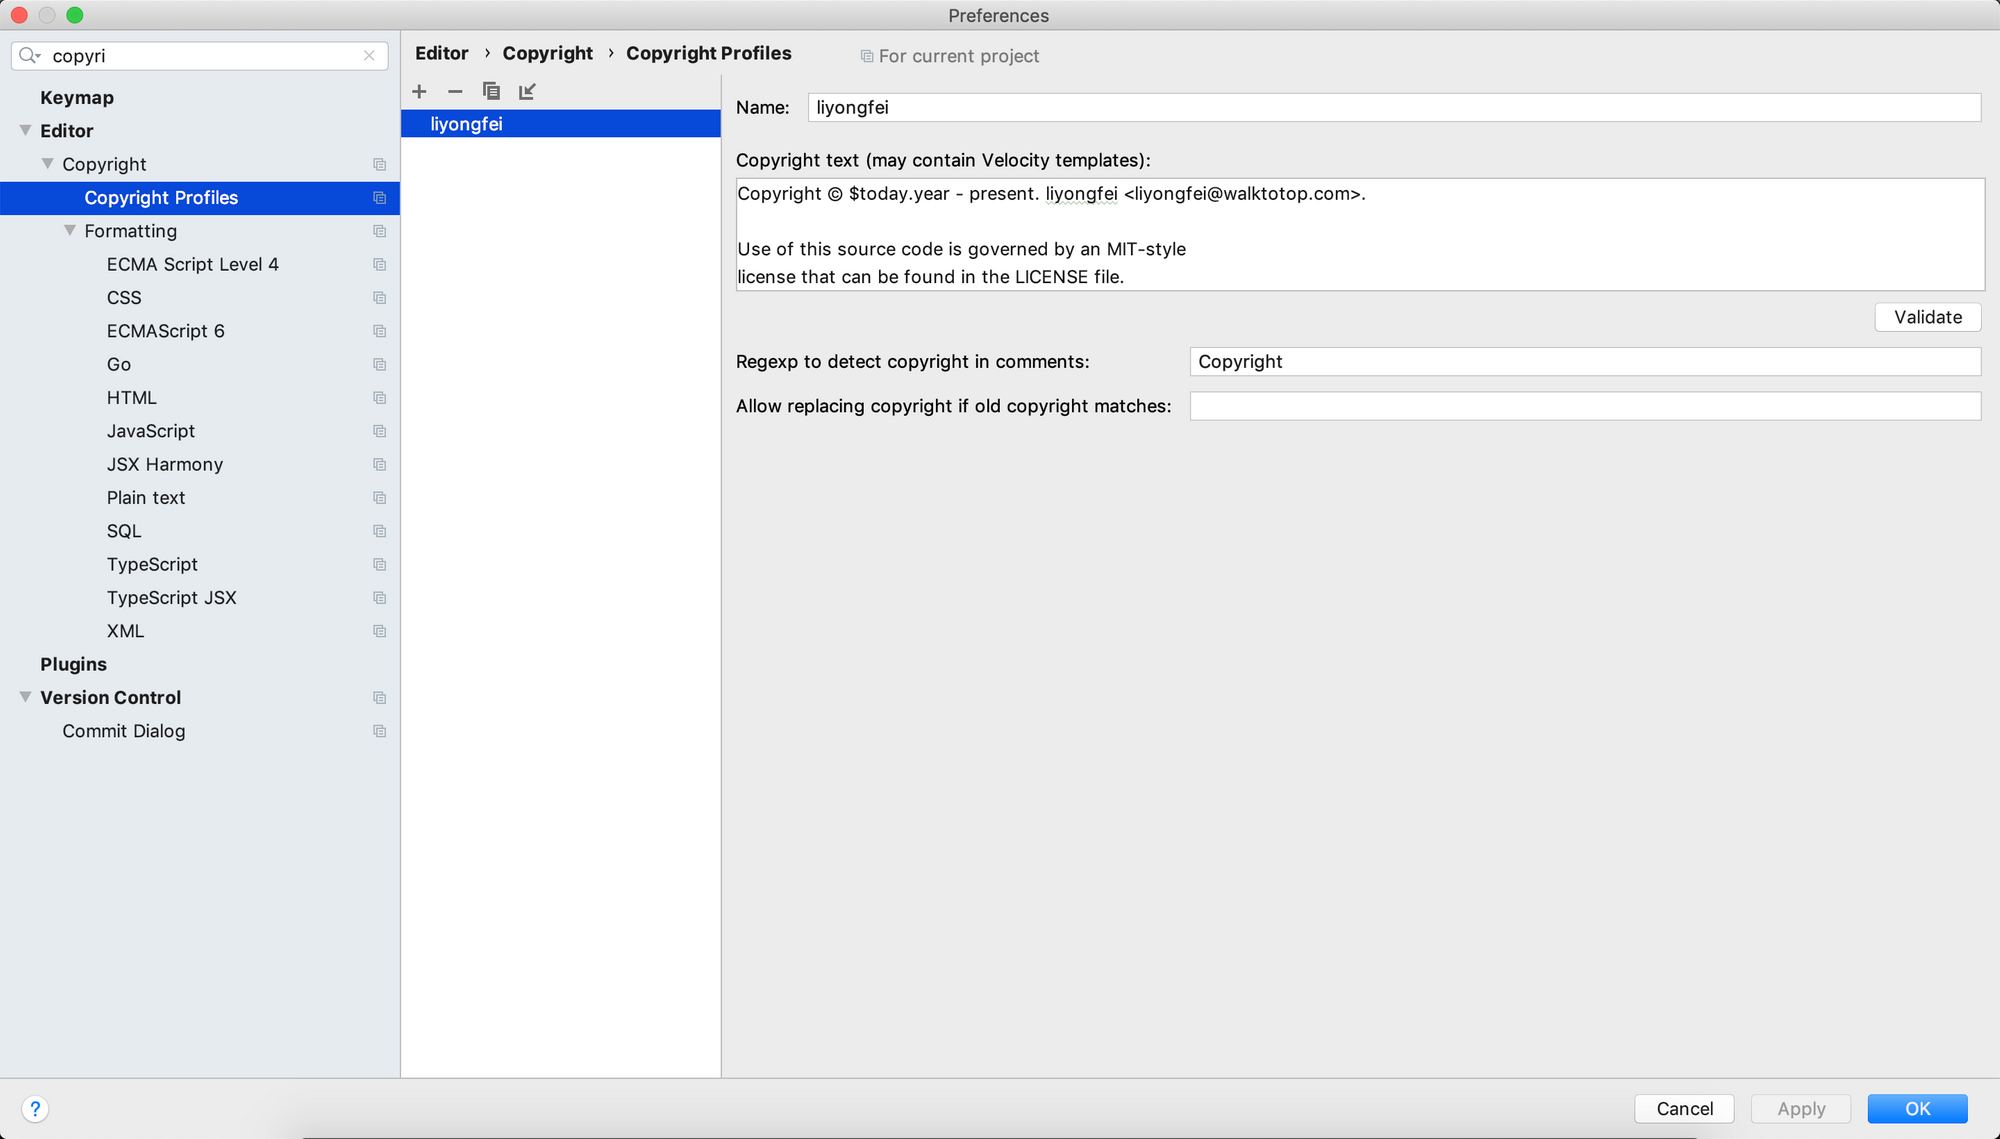
Makefile 文件
主要包含一些常用工具:如运行测试、文件格式校验等,可根据需要进行扩展
# A Self-Documenting Makefile: http://marmelab.com/blog/2016/02/29/auto-documented-makefile.html
OS = $(shell uname | tr A-Z a-z)
export PATH := $(abspath bin/):${PATH}
# Build variables
BUILD_DIR ?= build
export CGO_ENABLED ?= 0
export GOOS = $(shell go env GOOS)
ifeq (${VERBOSE}, 1)
ifeq ($(filter -v,${GOARGS}),)
GOARGS += -v
endif
TEST_FORMAT = short-verbose
endif
# Dependency versions
GOTESTSUM_VERSION = 0.4.0
GOLANGCI_VERSION = 1.21.0
# Add the ability to override some variables
# Use with care
-include override.mk
.PHONY: clear
clear: ## Clear the working area and the project
rm -rf bin/
.PHONY: check
check: test lint ## Run tests and linters
bin/gotestsum: bin/gotestsum-${GOTESTSUM_VERSION}
@ln -sf gotestsum-${GOTESTSUM_VERSION} bin/gotestsum
bin/gotestsum-${GOTESTSUM_VERSION}:
@mkdir -p bin
curl -L https://github.com/gotestyourself/gotestsum/releases/download/v${GOTESTSUM_VERSION}/gotestsum_${GOTESTSUM_VERSION}_${OS}_amd64.tar.gz | tar -zOxf - gotestsum > ./bin/gotestsum-${GOTESTSUM_VERSION} && chmod +x ./bin/gotestsum-${GOTESTSUM_VERSION}
TEST_PKGS ?= ./...
.PHONY: test
test: TEST_FORMAT ?= short
test: SHELL = /bin/bash
test: export CGO_ENABLED=1
test: bin/gotestsum ## Run tests
@mkdir -p ${BUILD_DIR}
bin/gotestsum --no-summary=skipped --junitfile ${BUILD_DIR}/coverage.xml --format ${TEST_FORMAT} -- -race -coverprofile=${BUILD_DIR}/coverage.txt -covermode=atomic $(filter-out -v,${GOARGS}) $(if ${TEST_PKGS},${TEST_PKGS},./...)
bin/golangci-lint: bin/golangci-lint-${GOLANGCI_VERSION}
@ln -sf golangci-lint-${GOLANGCI_VERSION} bin/golangci-lint
bin/golangci-lint-${GOLANGCI_VERSION}:
@mkdir -p bin
curl -sfL https://install.goreleaser.com/github.com/golangci/golangci-lint.sh | bash -s -- -b ./bin/ v${GOLANGCI_VERSION}
@mv bin/golangci-lint $@
.PHONY: lint
lint: bin/golangci-lint ## Run linter
bin/golangci-lint run
.PHONY: fix
fix: bin/golangci-lint ## Fix lint violations
bin/golangci-lint run --fix
# Add custom targets here
-include custom.mk
.PHONY: list
list: ## List all make targets
@${MAKE} -pRrn : -f $(MAKEFILE_LIST) 2>/dev/null | awk -v RS= -F: '/^# File/,/^# Finished Make data base/ {if ($$1 !~ "^[#.]") {print $$1}}' | egrep -v -e '^[^[:alnum:]]' -e '^$@$$' | sort
.PHONY: help
.DEFAULT_GOAL := help
help:
@grep -h -E '^[a-zA-Z_-]+:.*?## .*$$' $(MAKEFILE_LIST) | awk 'BEGIN {FS = ":.*?## "}; {printf "\033[36m%-30s\033[0m %s\n", $$1, $$2}'
# Variable outputting/exporting rules
var-%: ; @echo $($*)
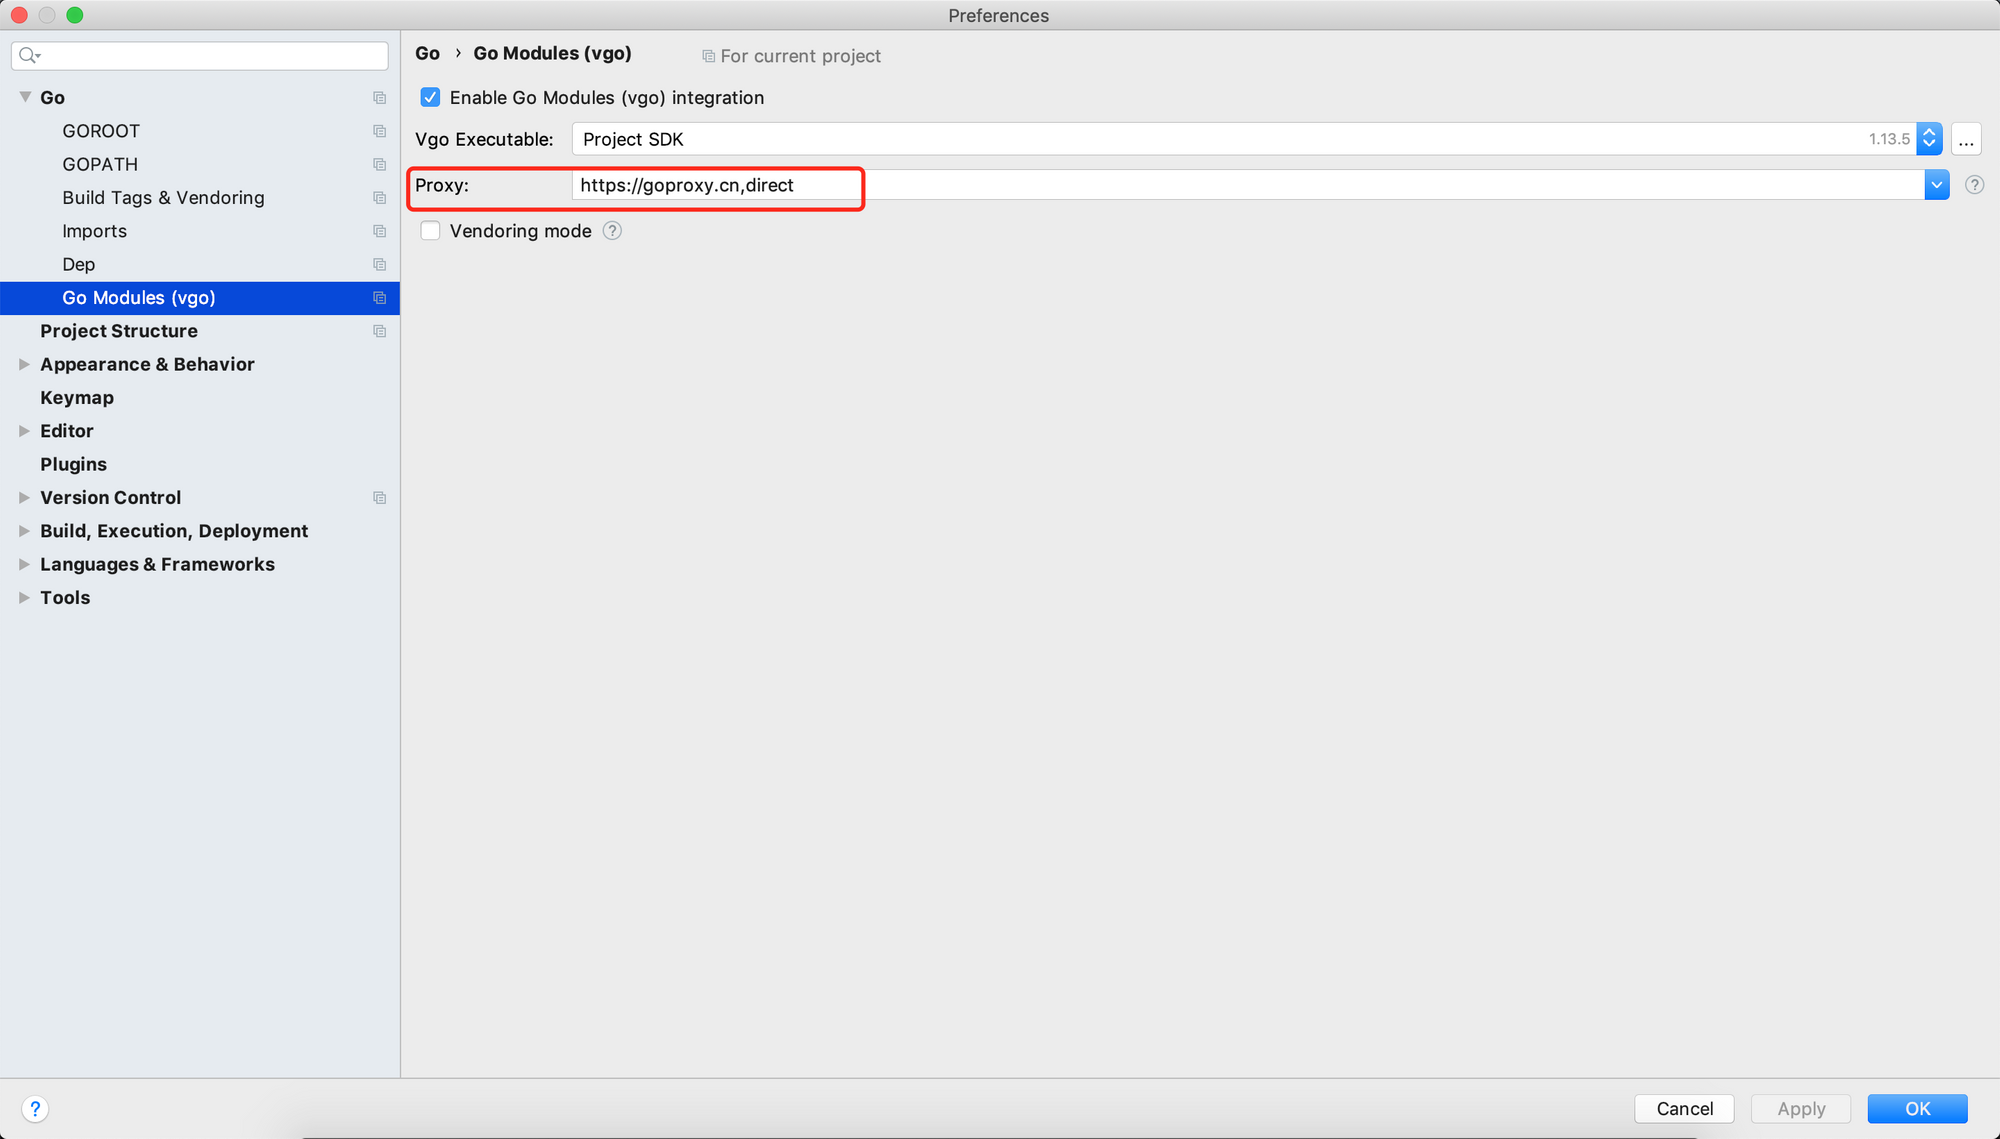
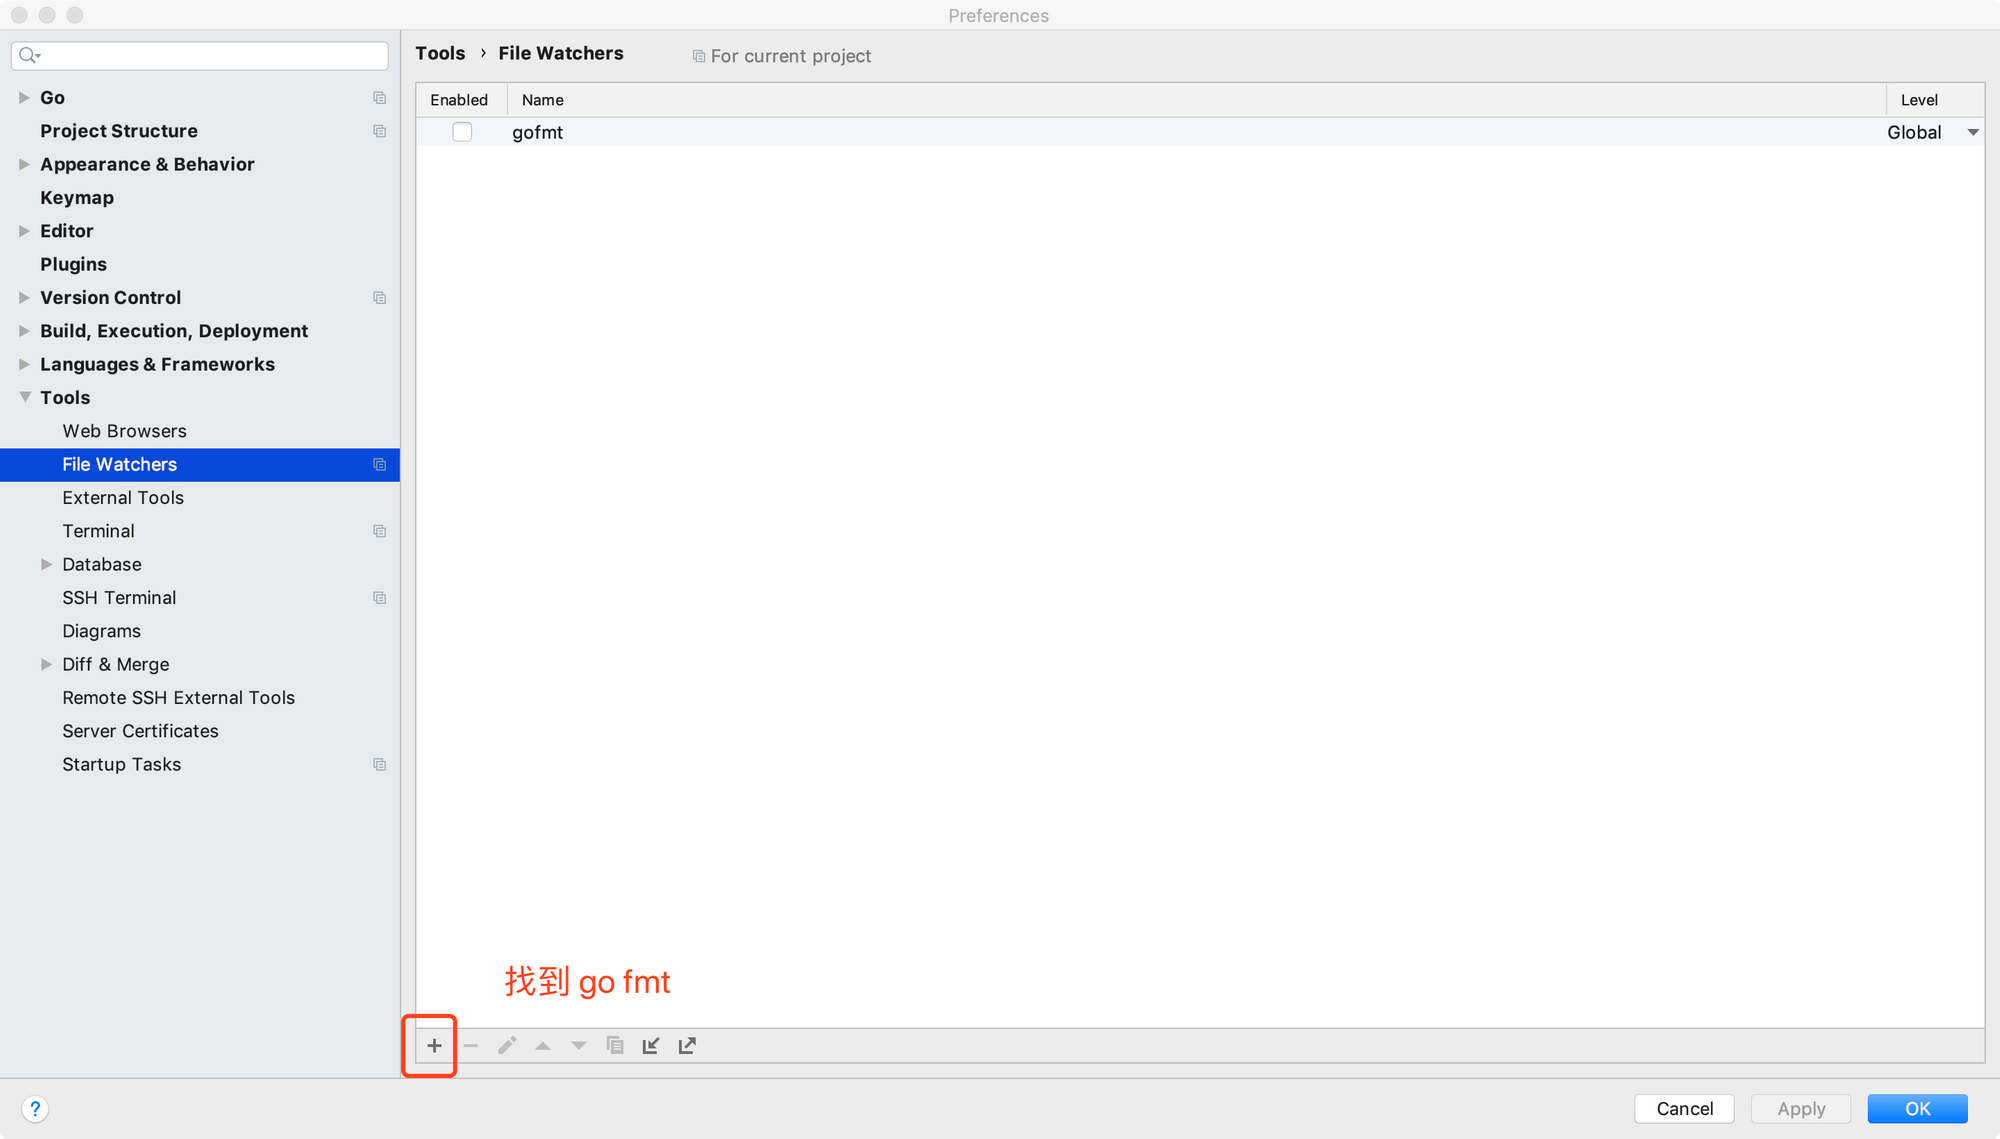
varexport-%: ; @echo $*=$($*)Goland 配置
- 注意使用国内的
goproxy
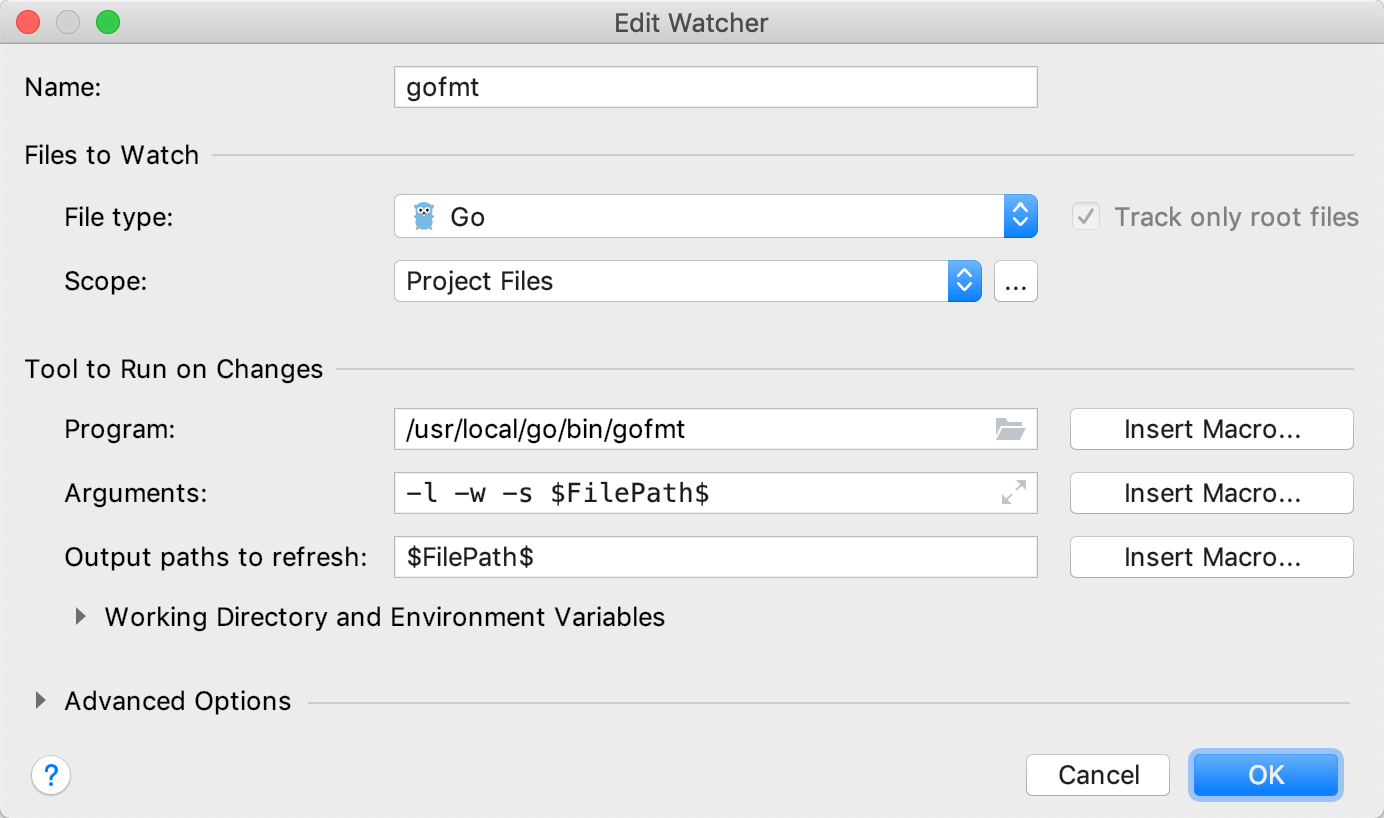
gofmt-配置文件自动进行格式化

Github-CI 配置go 的相关流程
一般直接在 项目界面的 Actions 直接可以添加流程,有很多流程模版可以选择,然后根据需要进行修改,也可以直接在项目目录下创建 .github/workflows/ci.yml 流程配置文件,文件名可以自定义,下面是我这个项目使用的一个只在 master 分支触发的流程

name: CI
on:
  push:
    branches:
      - master
  pull_request:
jobs:

  build:
    name: Build
    runs-on: ubuntu-latest
    steps:

    - name: Set up Go 1.13
      uses: actions/setup-go@v1
      with:
        go-version: 1.13
      id: go

    - name: Check out code into the Go module directory
      uses: actions/checkout@v2

    - name: Get dependencies
      run: |
        go get -v -t -d ./...
        if [ -f Gopkg.toml ]; then
            curl https://raw.githubusercontent.com/golang/dep/master/install.sh | sh
            dep ensure
        fi

    - name: Run tests
      run: make test

    - name: Run linter
      run: make lint

#    - name: Build
#      run: go build -v .